Documentation
Here, I have compiled a detailed list of my experiences and step-by-step instructions for each project. I've made sure to provide explanations with sufficient detail, so you won't find yourself in a situation where you know the commands but don't understand how they work. This will save you hours of researching concepts that can be summarized in just five minutes.
Additionally, at the top of each project, you'll find a Too Long, Didn't Read (TLDR) section that provides a concise summary of the entire project, highlighting the most important details. This is especially useful if you're already familiar with the basics and don't have much time to spare.
*Click on the project titles to expand and view more information.
Router and Switch Setup for Home Network
What You Need: A Router and a Switch
Note: The router provided by most Internet Service Providers (ISPs) may not allow specific configuration settings. In that case, you may need to buy your own router to follow along.
Project Status: (DONE)
TL;DR:
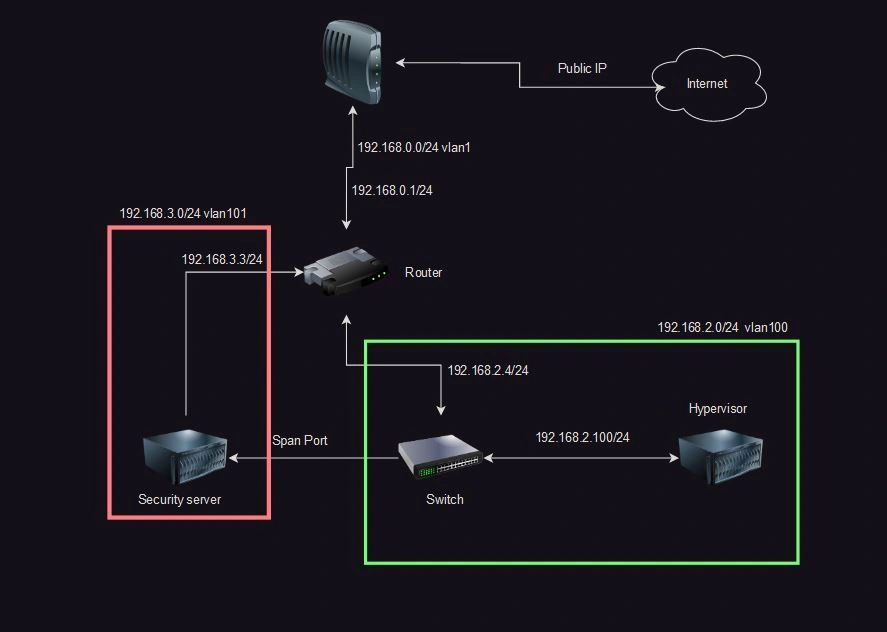
I set up a home network to host my websites, mail server, and upgrade my home lab. I used a router and a switch to set up three subnets and three VLANs, creating three separate internal networks. One was dedicated to personal use, another for projects and my home lab, and the final one for my security monitoring tools.
Tutorial: (DONE)
To start off, let's get a network overview. Here is the setup we are going for:

I started by hooking up my modem into port 1 of my router, which was labeled as the WAN port. For now, the only IP that matters is the internal IP 192.168.0.1. Then I wired the switch to the router, and finally, I hooked up my server to the switch.
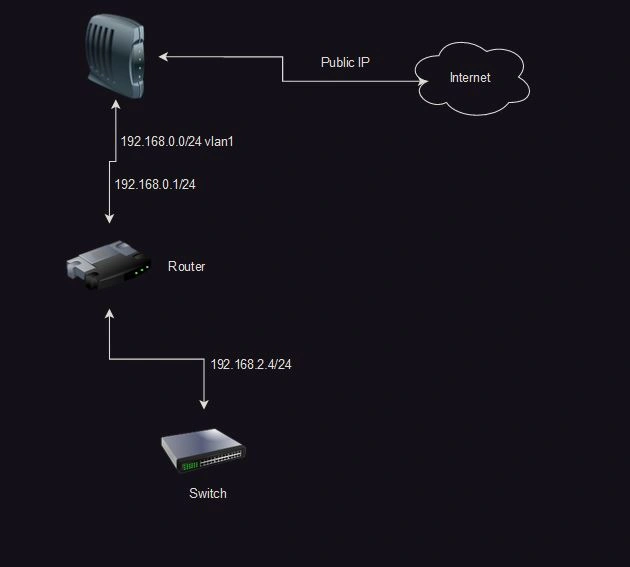
Now we need to configure the router and switch. With both of them wired up, we can manually plug into the router and access the login page by going to 192.168.1.1. If you don't know the internal IP of the router, you can find it by opening a terminal or command prompt and typing "ipconfig" on Windows or "ifconfig" on Linux. If "ifconfig" doesn't work, try the command "ip a". In the output, you should see a Default Gateway, and the IP following it is your router's IP address (note my IP is 192.168.1.2 even though my network diagram doesn't show this because I have a wireless network that I configured to be on a different subnet).
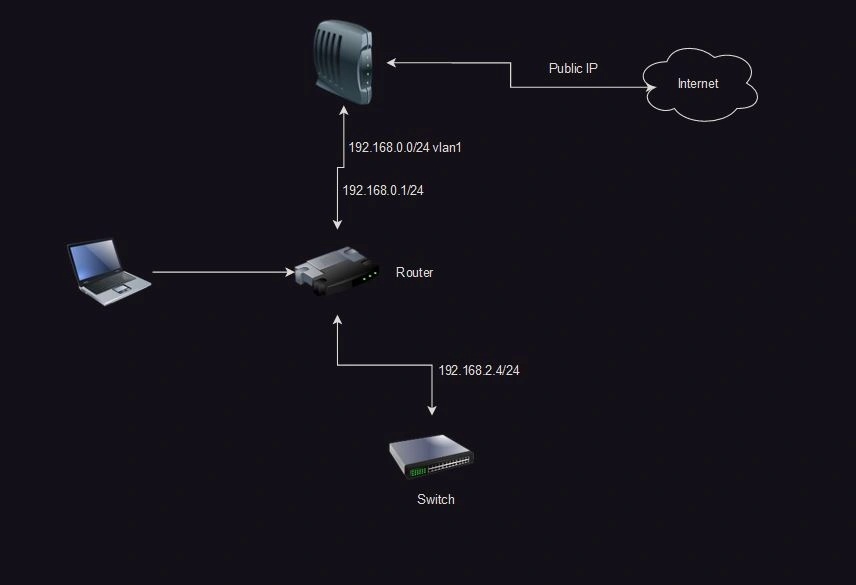

Now with the gateway identified, we can access the login page. We need to find the default credentials for your router. Most of them are simply "admin" for both the username and password, but if that doesn't work for your router, Google your router's name followed by "default credentials." For example, "Asus xxx router default credentials." If your router is supplied by an ISP, you may have to call them to get the login credentials.
You may be prompted to change your password after logging in. It's recommended to use a strong password, preferably more than 16 characters long.
I'm using a TP-Link router, but be aware that some TP-Link routers have vulnerabilities, so make sure you update the firmware. Your router's login page may look different, so explore around and find where these four things are located: "LAN, VLAN, Access Control, and Port Triggering". TP-Link decided to have weird names for the last two, so their common names are "Firewall" and "Port Forwarding".
Let's start with LAN. Open the LAN page. Here you can configure different subnets for my home network. I configured 2 other subnets: 192.168.3.0/24 on VLAN 101 and 192.168.2.0/24 on VLAN 100. The /24 is a subnet, which I will explain later, but it translates to 255.255.255.0.

Next, let's take a look at the DHCP tab. Here you can see all devices that are connected and their assigned IP addresses. The first thing you should do is set IP reservations for your switch. In my case, I have it set to 192.168.2.4, but normally it would be 192.168.2.2.

Now that we have our subnets, let's assign them to ports. Go to the VLAN tab. There, you should see all 3 of your subnets and VLAN 4094 for your WAN. You can ignore this. The .2.1 subnet should be on VLAN 100 with no ports assigned, and the same for the .3.1 subnet on VLAN 101 with no ports. We're going to edit this and give VLAN .2.1 port 3 (UNTAG) and .3.1 port 5 (UNTAG). Make sure they are set to UNTAG so each VLAN can communicate with each other VLAN. We will be changing this later, but while we're still setting up, this makes configuration easier.

To explain what we just did, we assigned port 3 to the 192.168.2.0/24 VLAN 100. Now, if we connect the switch to this port, all ports on the switch will be in the 192.168.2.0/24 range and communicate on VLAN 100. We can use this to expand the available ports we have while preparing to segregate the VLANs in the future.
We need to configure the firewall to block all incoming traffic except for the specific ports you plan to use. In this instance, I plan to host a website and a mail server, so I configured a block on all ports and then allowed access for port 80, 443, and 25. Port 80 and 443 are for HTTP and HTTPS, respectively, and port 25 is for Secure Mail Transport Protocol (SMTP). If you don't have anything running currently, just block all incoming traffic for now. (In this example, I don't block all traffic except for SSH as these are just sample rules.)

Finally, we configure port forwarding. In this instance, I need ports 80 and 443 to hit my reverse proxy, so I configure port 80 and 443 to forward to my reverse proxy server, which is using the IP 192.168.2.6. Port 25 needs to be forwarded to the IP 192.168.2.5 where my mail server lives.

There's a lot more we can do, but for a basic network setup, this will work. I can't tutorialize every router out there, so explore around the interface and see what cool things you can do. I would also recommend setting up a pfSense firewall between your router and your home network for more granular control. Keep an eye out for that project coming soon.
Security Onion (SIEM)
What You Need: A Server or a Hypervisor
Note: To set up Security Onion, the minimum specs are 16 gigs of RAM, 4 vCPUs, and 200 gigs of storage. Another thing to note is that my hardware was too new for the ISO, so I built it on Ubuntu Desktop. However, they have an ISO that's CentOS-based, which I would recommend.
Project status: (In Progress)
TLDR;
I built a Security Onion server on top of Ubuntu Desktop. I then configured a SPAN port on my monitoring NIC to collect all packets going to or from my hypervisor. I put the other port it uses to access the internet on a separate subnet to enhance network security. From there, I started setting up and configuring Security Onion tools on my endpoints. The tools I have set up so far include OSquery, Salt, FleetDM, and Wazuh. I also configured the firewall to allow the tools while locking down SSH access.
Put packet flow diagram here
Tutorial: (In Progress)
XCP-NG and Xen Orchestra
What You Need: A Server
Note: This is a type 1 hypervisor, so it's supposed to be on bare metal. I haven't tested virtualization, but it's not intended to be virtualized, so a server may be required. Minimum specs: 6 vCPUs and 8 GB of RAM with at least 100 GB of storage.
Project status: (DONE)
TLDR;
I installed the XCP-ng ISO on a local server to turn it into a bare-metal hypervisor, also referred to as a type 1 hypervisor (https://xcp-ng.org/#easy-to-install). Additionally, I compiled Xen Orchestra from source (https://github.com/ronivay/XenOrchestraInstallerUpdater) on the hypervisor and used the 'xo-vm-import.sh' script to launch the graphical user interface, known as Xen Orchestra. As a final step, I configured a local storage repository for ISO files, allowing me to easily spin up Ubuntu Server, Ubuntu Desktop, and OpenBSD.
Tutorial: (DONE)
Now with the home network configured, we can set up an XCP-ng server running Xen Orchestra. To start, grab the ISO from the XCP-ng website (https://xcp-ng.org/#easy-to-install). You can load this onto a USB using Balena Etcher (https://etcher.balena.io/). Finally, plug it into your computer and boot from the USB. Keep in mind that this will wipe the hard drive.
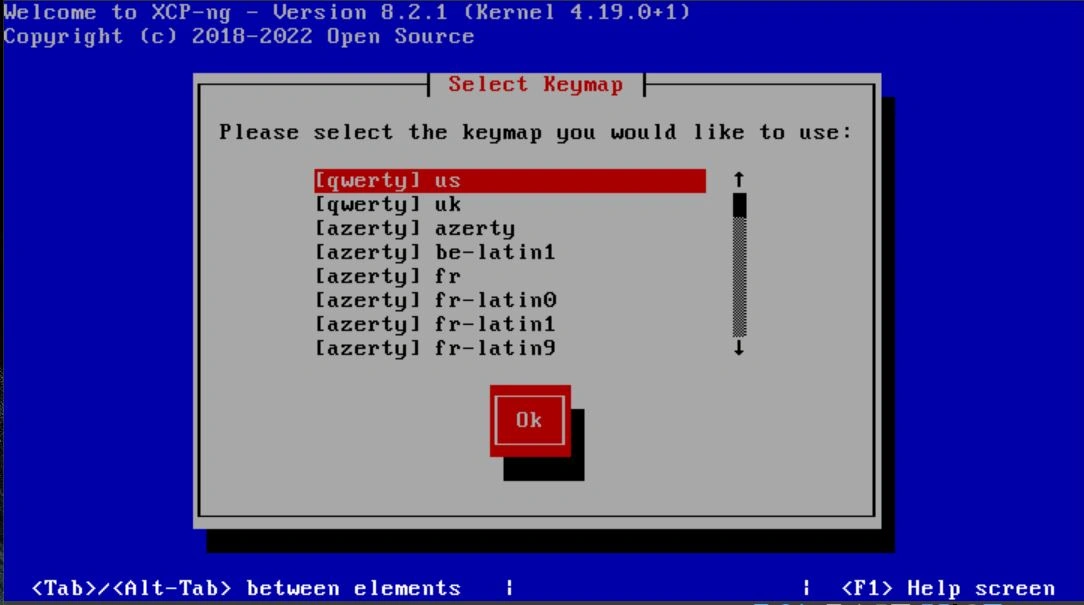
Once the boot process has started, it is going to prompt you to select a keyboard. I chose the default "[qwerty] us". You can use the arrow keys to move up and down and hit Tab to jump to the Ok button and then Enter to continue.
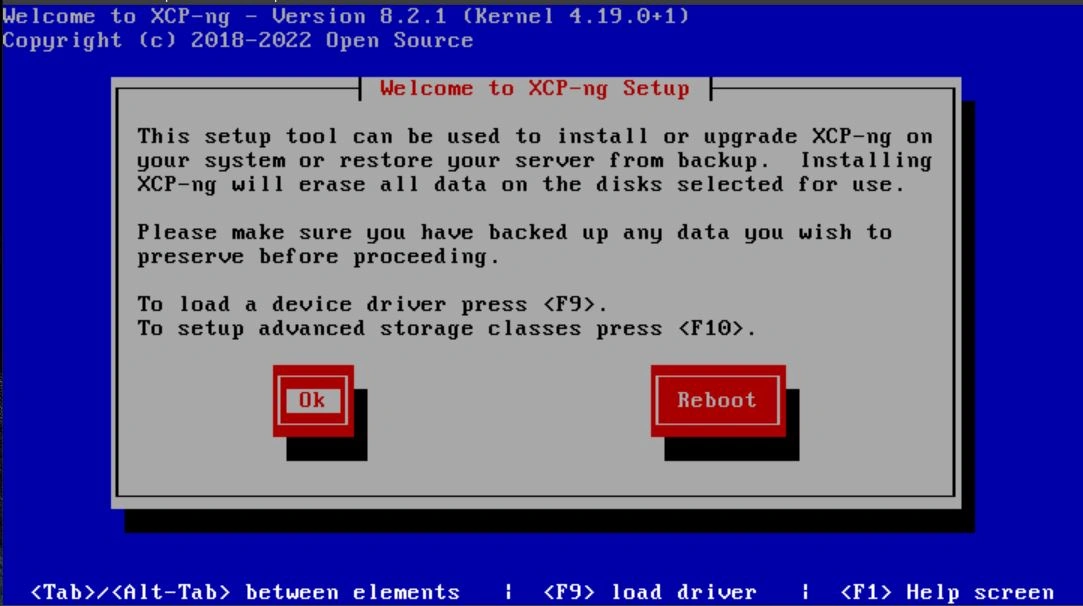
The next screen will tell you about using the ISO to upgrade; simply hit Enter to skip this screen.
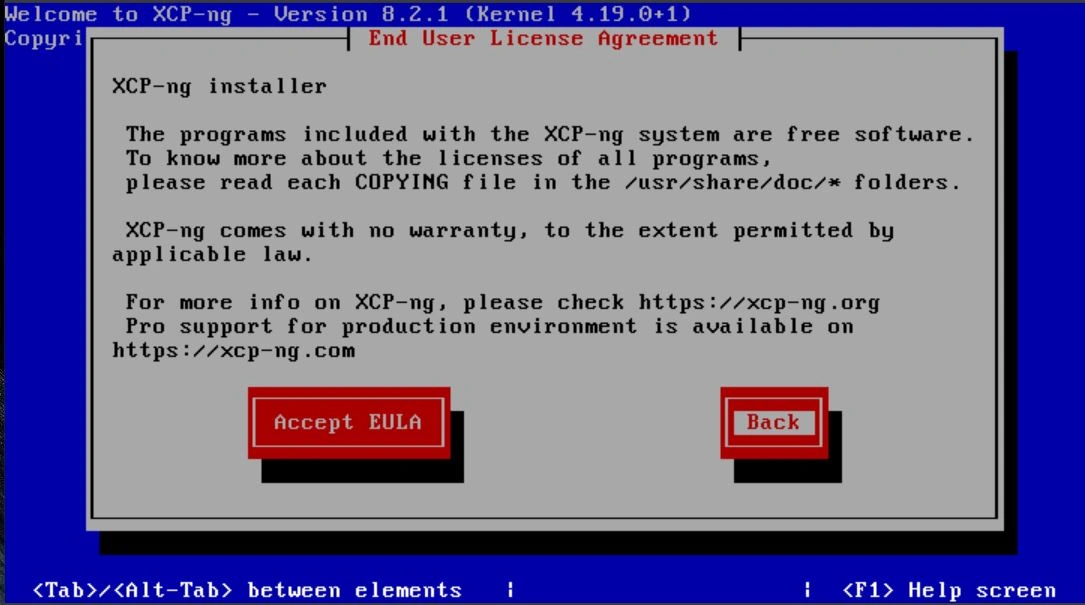
Next, it will ask you to accept the EULA.
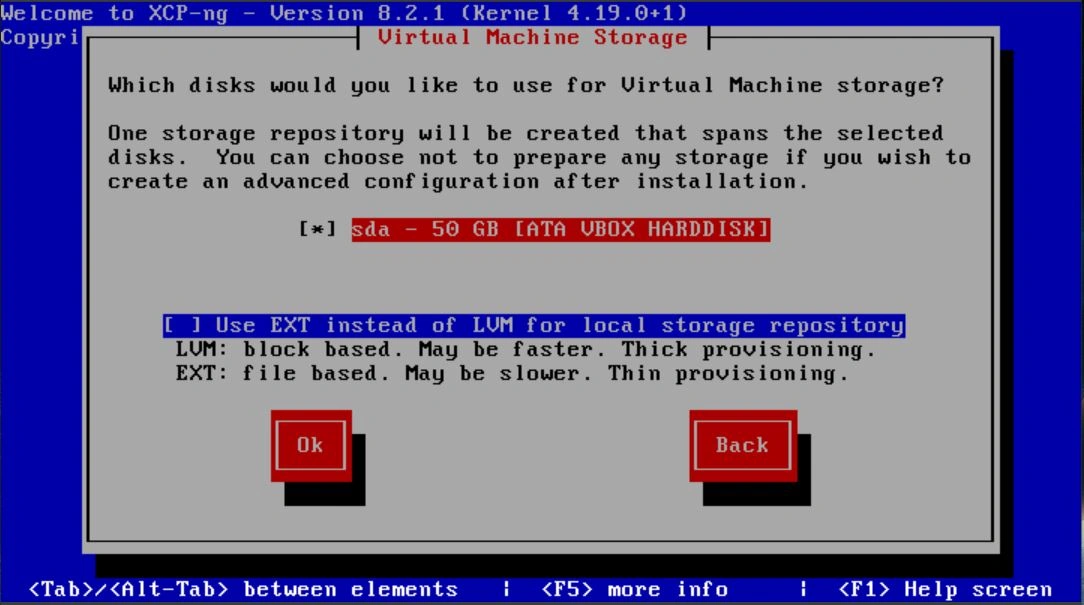
The next screen will ask you about storage; leave this as the defaults unless you need to change it. Again, you can use Tab to hop to the Ok button and Enter to continue.
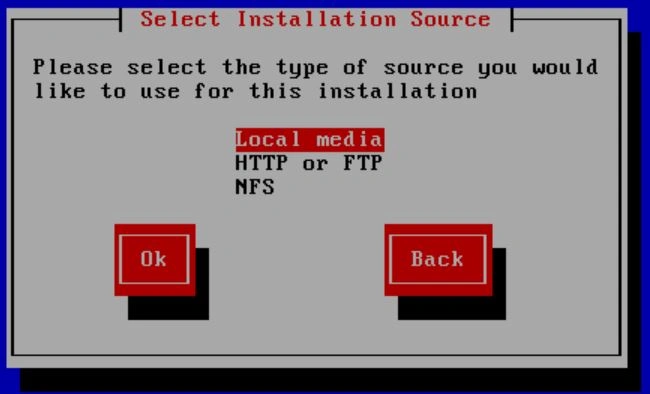
Next is the boot source; select "Local media" if you're booting from the ISO using a USB.
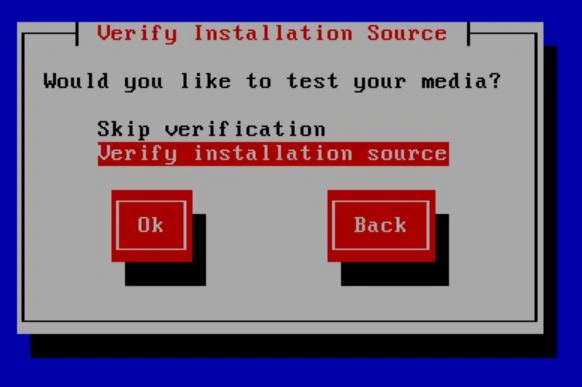
It will then prompt you for media verification. I'm choosing to skip this step, but for verification, it is recommended to verify your media. You can also do this by hashing the ISO with SHA256 and then comparing it to the string on the website. I have copied it here for ease of reference: "SHA256: 93853aba9a71900fe43fd5a0082e2af6ab89acd14168f058ffc89d311690a412" (this is for version 8.2).
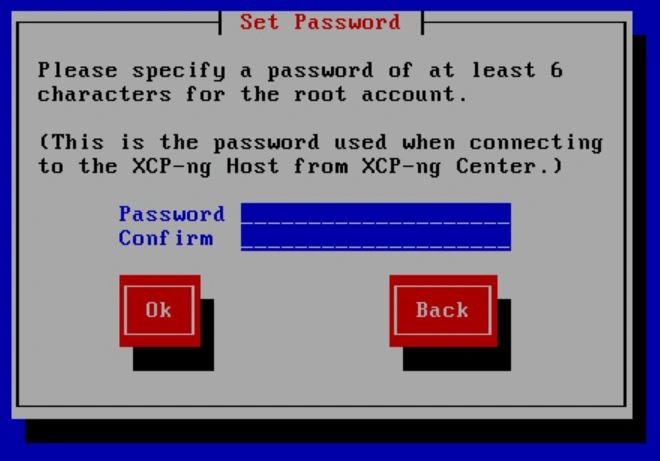
The next step involves creating a password. Set something strong, above 16 characters, for security.
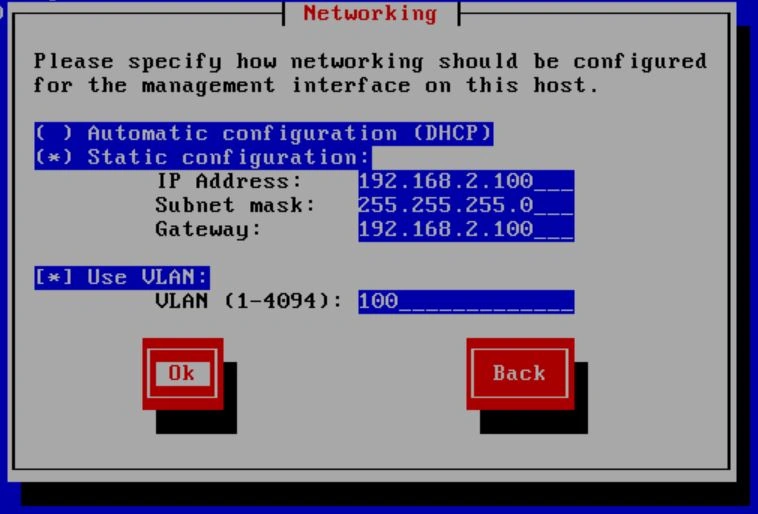
Next is the networking screen. I highly recommend setting a static IP, but you can also use DHCP if needed. In this instance, my IP will be set to 192.168.2.100 with a subnet mask of 255.255.255.0 and a gateway of 192.168.2.1. The VLAN will be 100, but if you don't have VLANs configured, leave it blank. If you want to configure VLANs, refer to my home network project.
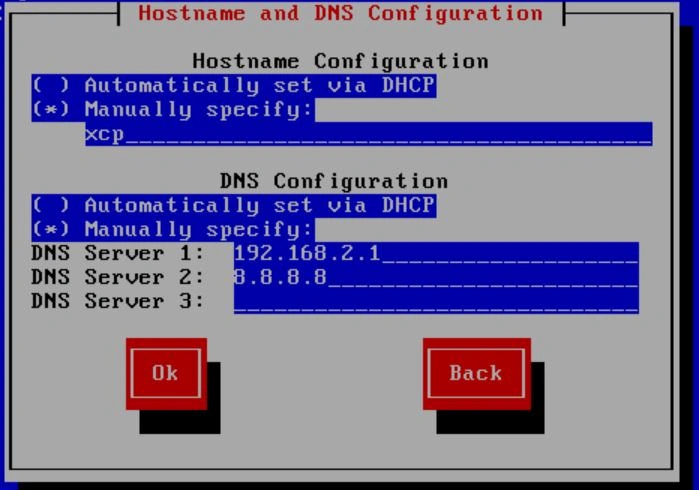
We're almost done with the configuration. The next step is to configure a hostname and DNS settings. I will set the hostname to "xcp," but you can make it whatever you want. For the DNS, I input my router and then Google as a fallback, but you can also let DHCP handle this.
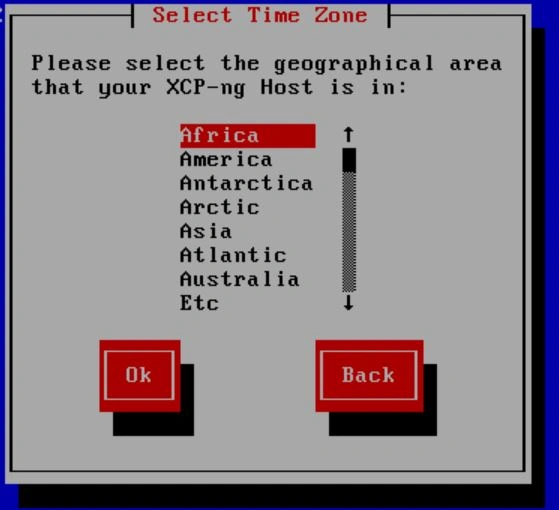
Next, choose your geographical location.
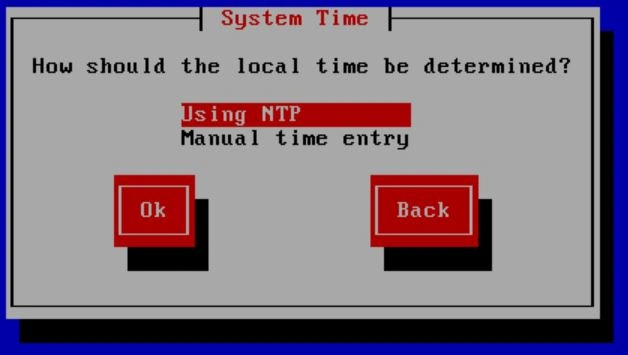
Now it will ask you about local time; select "Using NTP".
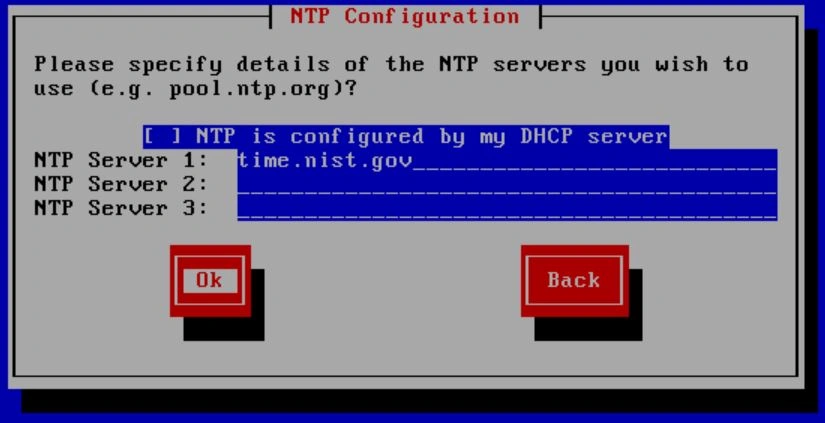
The next step is to input time servers. You can allow DHCP to do this, but I prefer an option with more redundancy, so I use the time servers provided by NIST (https://tf.nist.gov/tf-cgi/servers.cgi). I would recommend inputting at least 2 different time servers, but for this tutorial, I will use the global address for NIST servers.
You're almost there. The final step of the imaging process is confirming to wipe the disk. Select "Install XCP-ng" and then wait. Grab a coffee or something, maybe do some lunges.

When you get back, it may ask you if you want to install the supplemental packs. Select "No" and then wait again.

When it's done, you will get a pop-up saying to remove the media. Pop the USB out and select Ok.

After finishing the imaging steps and unmounting the ISO, The computer will restart and then you should see a splash screen with multiple options. You can navigate this screen with the arrow keys and press enter to select options. (Note this picture was captured in a virtualbox environment so the network information is not accurate)
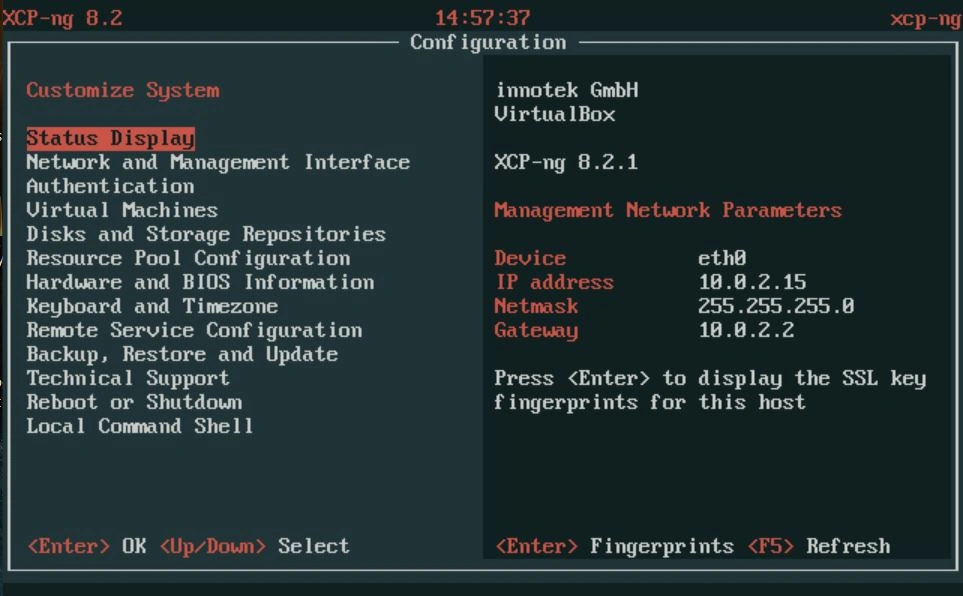
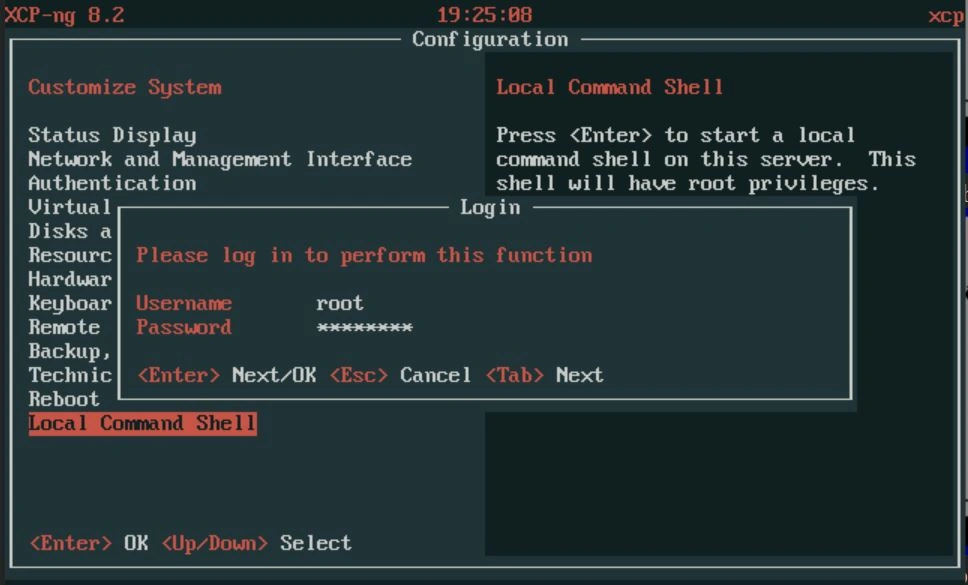
The option we want is the local command shell. Select that option and then enter the password you configured.
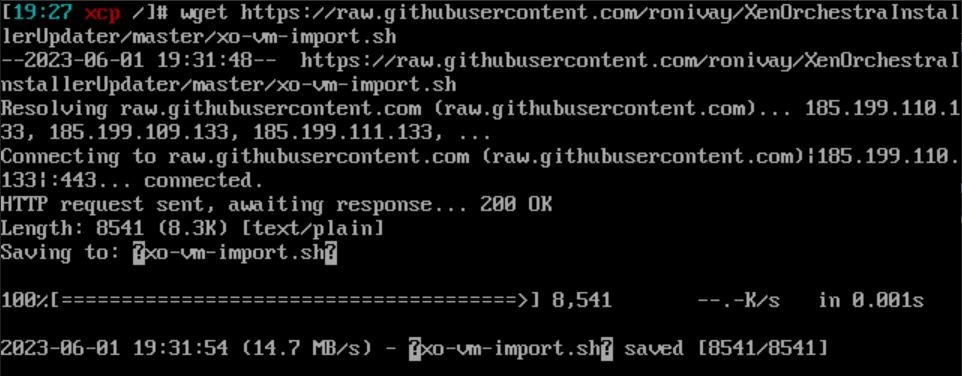
With the shell open, we want to pull down the deployment script for Xen Orchestra. To start, use the following command: "wget https://raw.githubusercontent.com/ronivay/XenOrchestraInstallerUpdater/master/xo-vm-import.sh".
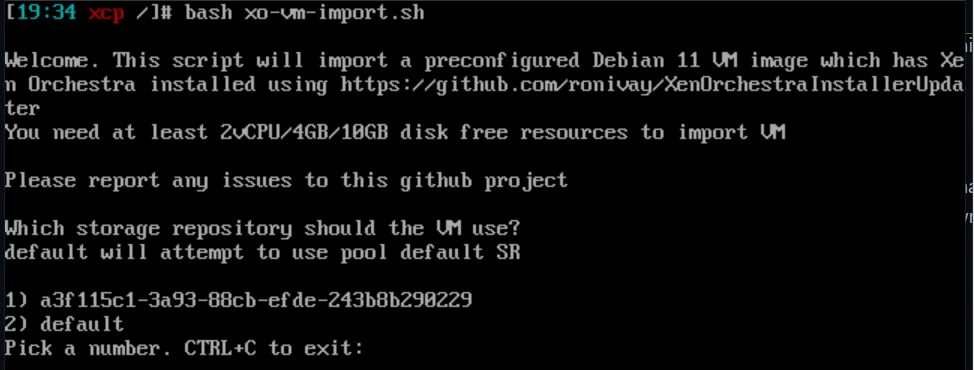
Now we are going to run the script with the command "bash xo-vm-import.sh". It will prompt you to select a storage repository for the VM. If you're following along, there should only be 2 options: default and a long string. Choose the long string by typing the number associated with it.
Next, it will ask which network to select. Choose the one associated with eth0.

Next is the network configuration. Just let DHCP handle this unless it errors out in which case give it a static IP for now you can change it later. Make sure you reserve the address on your router. This IP will be used to reach the management interface from a browser, so remember it. In my case, I will use 192.168.2.3. Once that's done, just wait. It will download the VM. Also, the VM requires a minimum of 4 vCPUs, 8 gigs of RAM, and 20 gigs of space. I already took this into account for the minimum specs above, so if you follow that, you should be fine.
Now that the VM is up, we want to configure SSH and the web interface login. The username and password by default for SSH are 'xo' and 'xopass'. So, login through SSH and change that. You should be prompted upon logging in for the first time, but if you're not, use the command 'passwd' and follow the prompts to change the password. I configured it so the server is only accessible through keys located on my security server. Refer to my Security Onion Project for a guide on setting that up.

Now, go to a browser and enter the IP of the Xen VM (192.168.2.3 for me) to reach the web interface. Once you get to the web interface, the default username and password are '[email protected]' and 'admin'. Make sure you change the password again. It should prompt you, but if it doesn't, simply go to Settings and then Users. From there, you can click to change the password.
Once logged in, head to the Settings section on the left and select Servers. Here, we need to add our server. Type in the IP of your XCP-ng server (192.168.2.100 in my case) and then type in the username and password you use to log in to that server. If all goes well, you should see "connected" appear. Also, make sure to check "Unauthorized Certificates".
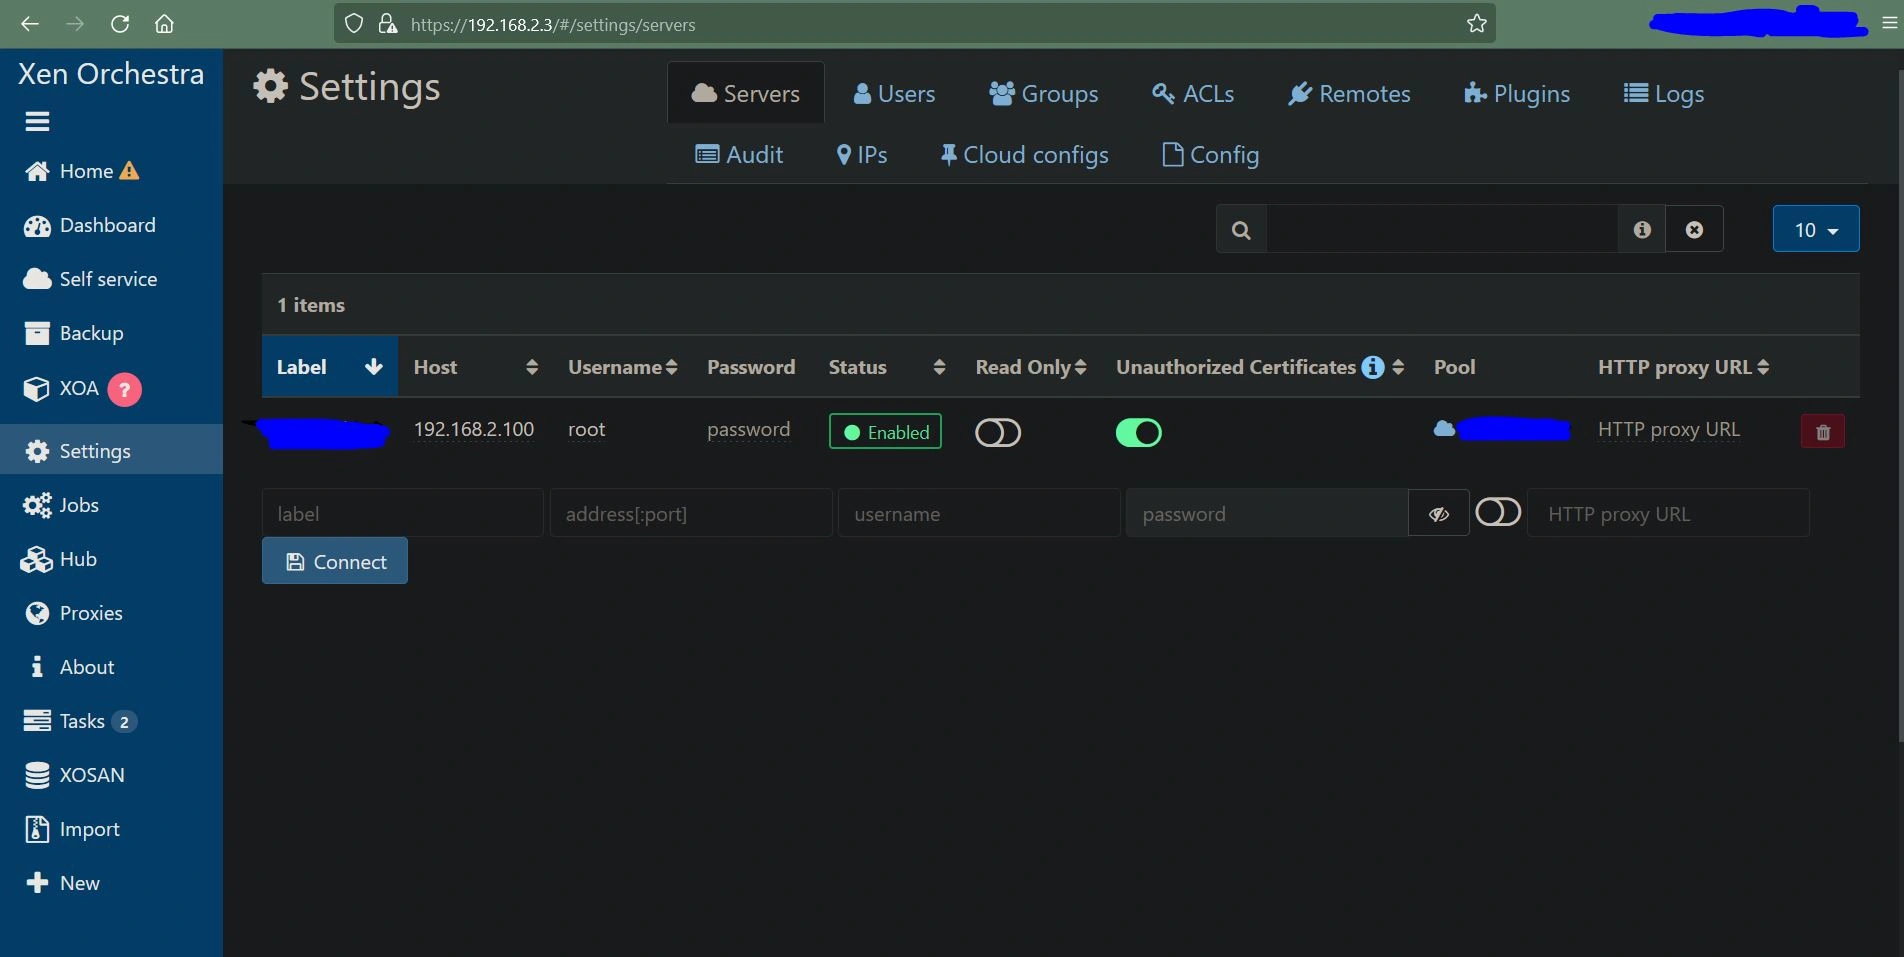
Now that that's done, the last step is to configure local storage for the ISO files so you can create VMs.
On the left, select the "New" button and choose Storage.

Now go back to your XCP-ng server and create a new root directory called '/ISO' with the command "mkdir /ISO".

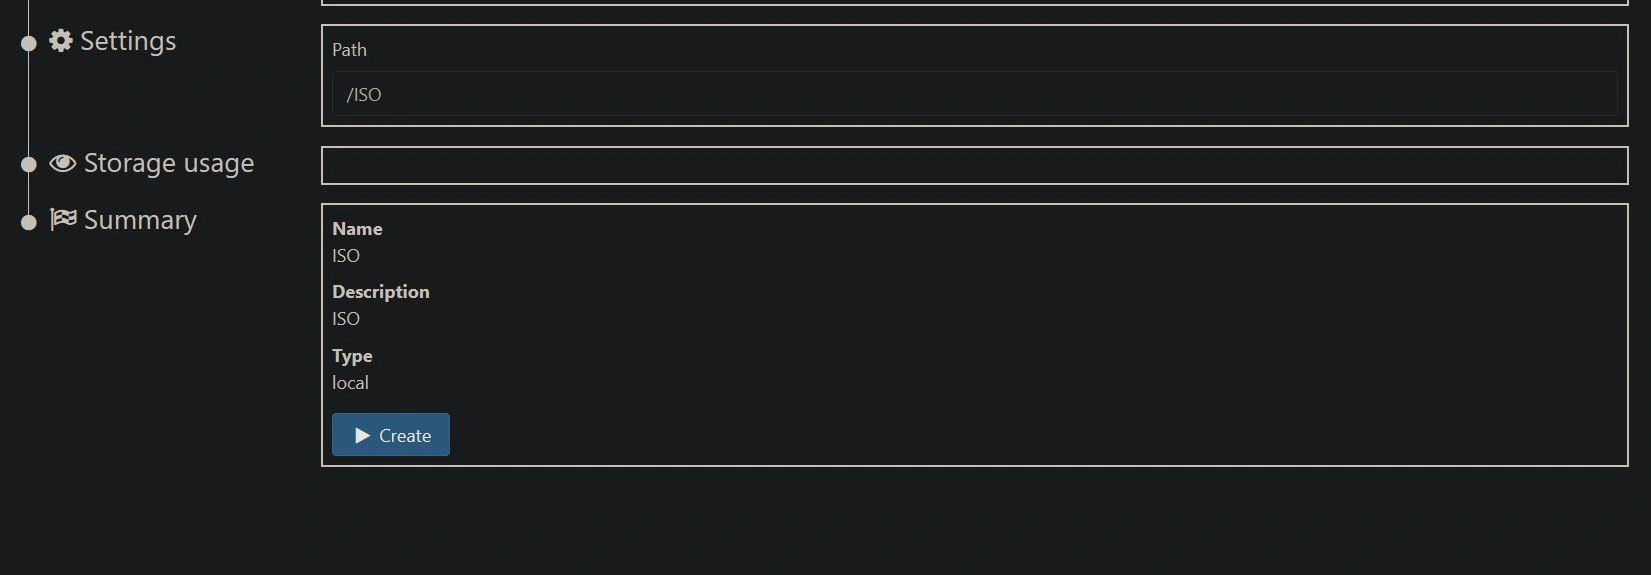
Back on your Xen Orchestra GUI, select the Host we just added, then input the name and description. In this case, I will use "ISO" for both.
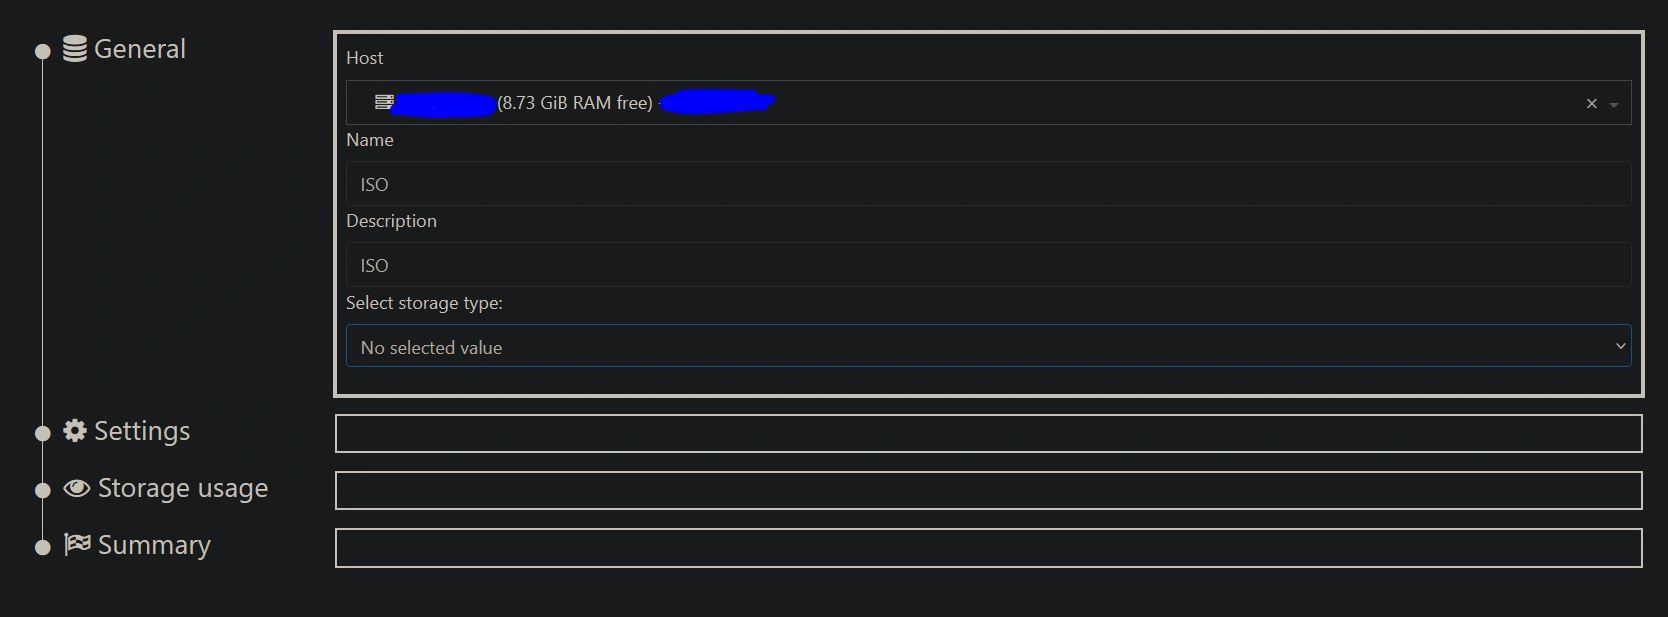
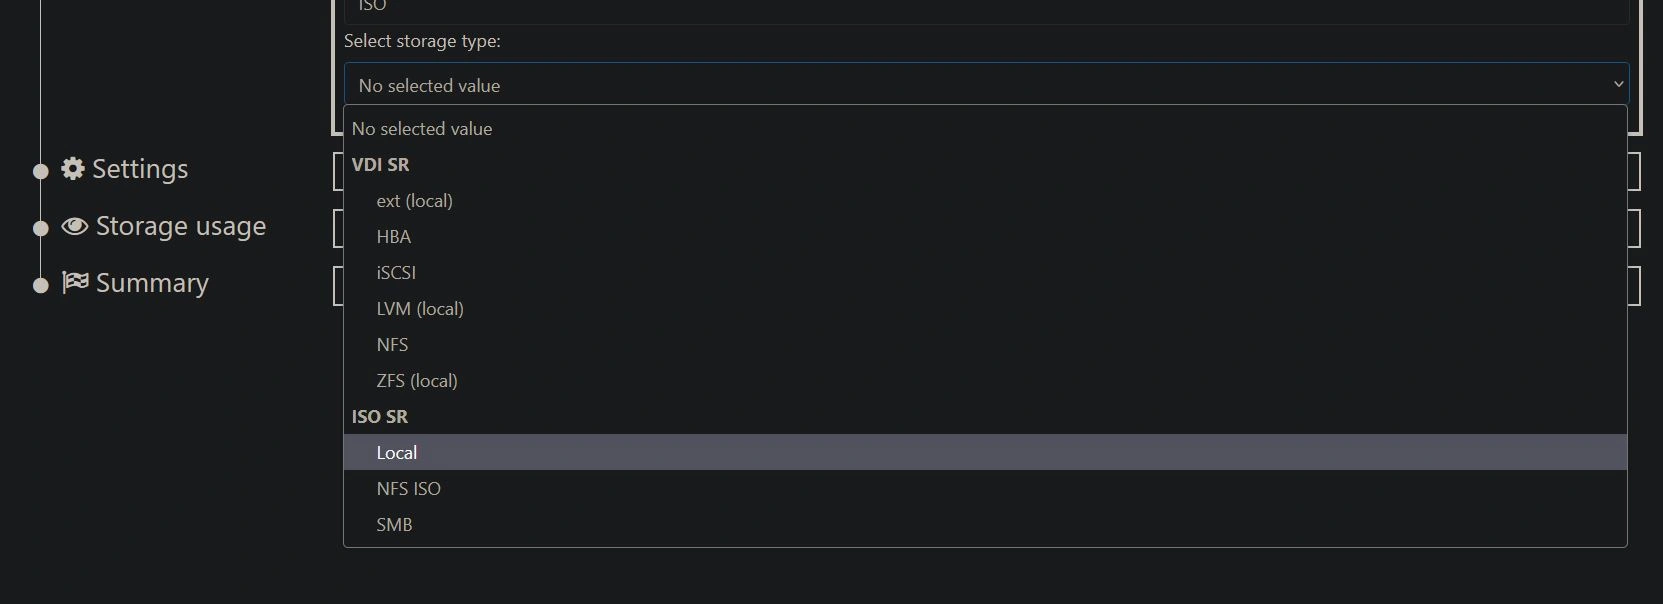
Then select the storage type, and in the drop-down under "ISO SR", choose "Local".
Finally, type in the path. In this case, it would be "/ISO", and then click Create. You can now access any ISO files you put in that directory. To download ISO files, use 'cd' to navigate to the '/ISO' directory and then use the command "wget {url to iso}". From there, they should be available when setting up VMs.
Congratulations! You just set up a bare-metal hypervisor with Xen Orchestra as a GUI. There's a lot you can do here, so feel free to explore. If you want, check out some of my other projects for ideas on what you can build on this new hypervisor.
Open Source Mail Server
What You Need: A Server or a Hypervisor
Note: This requires an FQDN unless you are only sending mail internally. Also, the minimum specs are 4 GB of RAM, and I recommend at least 500 GB of storage. If you don't know what an FQDN is, I would recommend reading through this tutorial (https://www.hostinger.com/tutorials/fqdn) to understand the terms I use in this tutorial.
Project status: (DONE)
TLDR;
I spun up an Ubuntu server on my hypervisor, configuring all the default settings. From there, I used `wget` to download the installer from iRedMail (https://github.com/iredmail/iRedMail/archive/refs/tags/1.6.3.tar.gz). After unzipping the file, I ran the script called `iRedMail.sh`.
Tutorial: (DONE)
To start on your hypervisor of choice, spin up an Ubuntu server. The ISO is available here (https://ubuntu.com/download/server). In my case, I will be using my XCP-ng server running Xen Orchestra. Give the VM at least 4 gigs of RAM, 2 vCPUs, and 200 gigs of storage. But if you plan to use it on any scale, I would give it 500+ gigs of storage.

When installing the ISO, make sure you configure a static IP. In my case, I will be using 192.168.2.5. Also, enable SSH access for your own sanity.
Once the Ubuntu server is up and running, start by updating using the commands "sudo apt update -y && sudo apt upgrade -y".
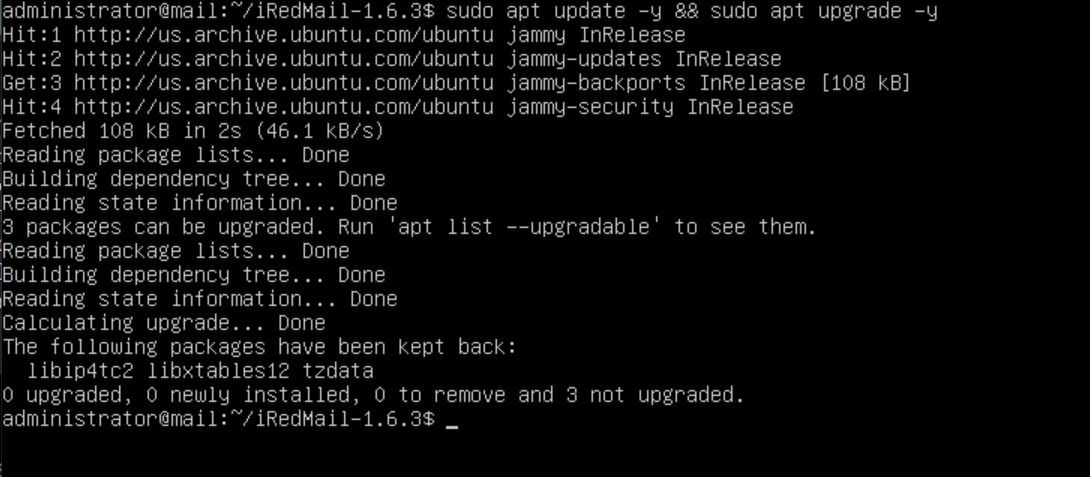
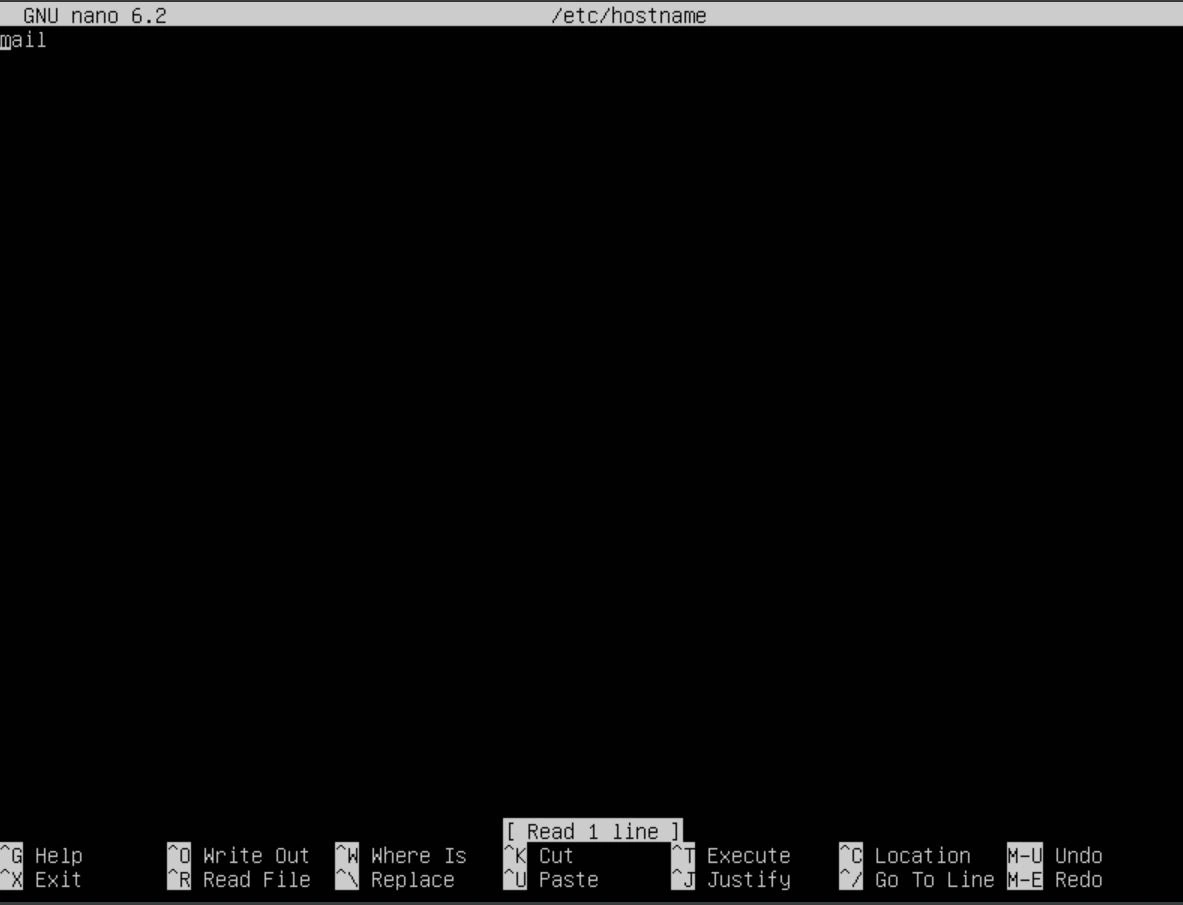
After the update is done, edit the /etc/hostname files to be a subdomain of your FQDN. For example, if my FQDN was example.com, I would make the hostname for this server "mail" so when it's deployed, we can configure it to be reachable via mail.example.com.

Now that the hostname is set, we want to configure the DNS records for our loopback address. To do this, edit the /etc/hosts file and make the top line "127.0.0.1 {your sub domain}.{your FQDN} {your subdomain} localhost". In my example, I will be using "example.com" as my FQDN and "mail" as my subdomain.
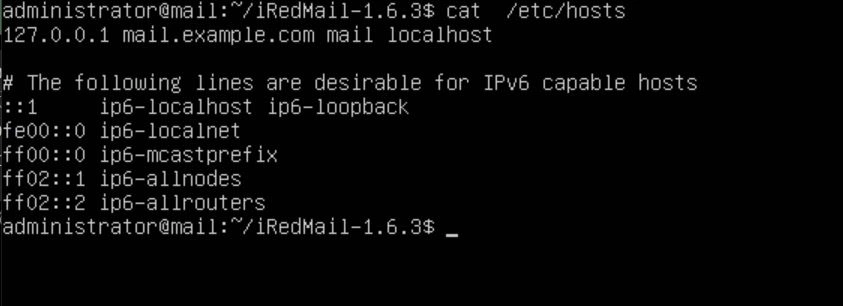
Now run the command "hostname -f". If it doesn't display the updated hostname, then reboot the server. If you still don't see it, check the files /etc/hosts and /etc/hostname to make sure your changes saved.

Now that your Ubuntu server is configured, you're ready to download the iRedMail installer. Go to this site and copy the link to their stable version (https://www.iredmail.org/download.html).
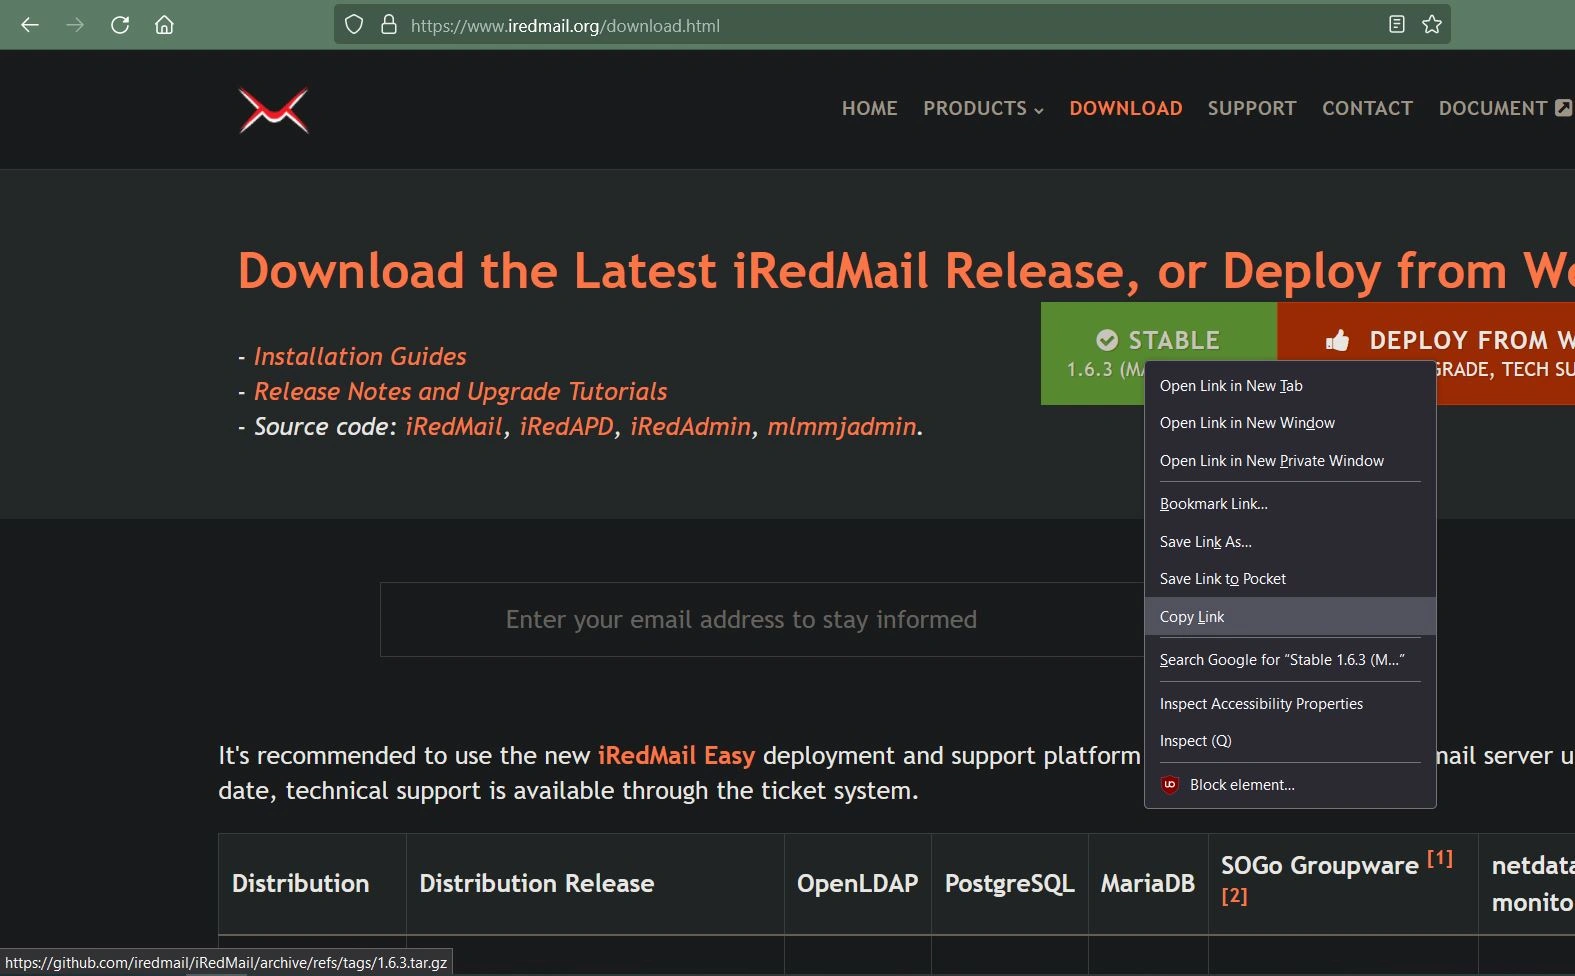
Next, use the command "wget {stable version link here}". This should download a zip file.
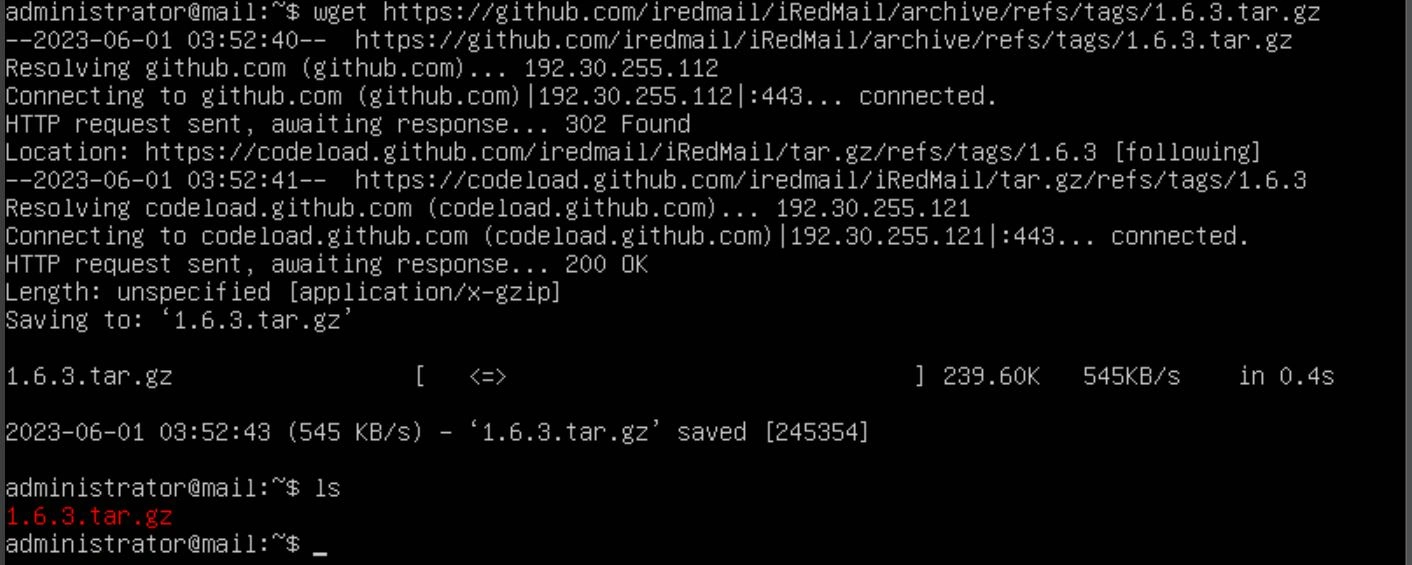
Now use the command "tar zxf {iRedMail_filename}.tar.gz". Once the command completes, you should have a directory. Navigate into that directory with the command "cd {iRedMail_filename}".

In that directory, there is a shell script called `iRedMail.sh`. Run this script with bash using the command "sudo bash iRedMail.sh".

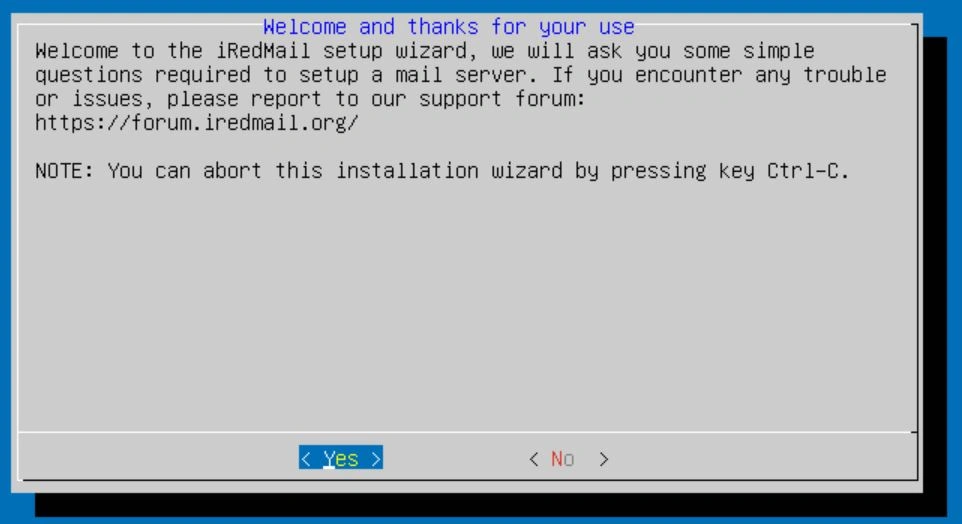
It's going to ask you a bunch of questions. You want to hit enter to continue and yes when the blue welcome screen comes up.
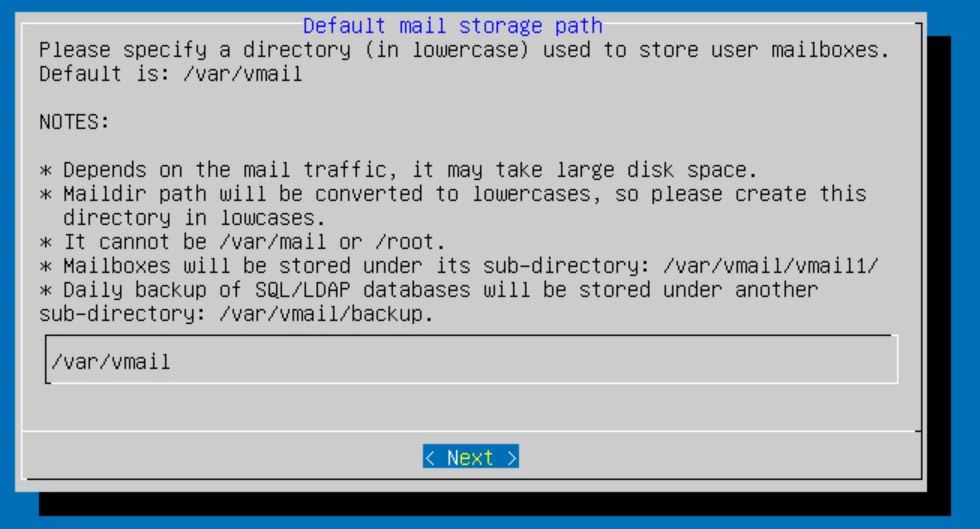
Next, it's going to ask you about logs. Select the default option. In this case, that would be /var/vmail.
Next, it will ask you about a web server. Leave nginx selected and hit enter to move on to the next screen.
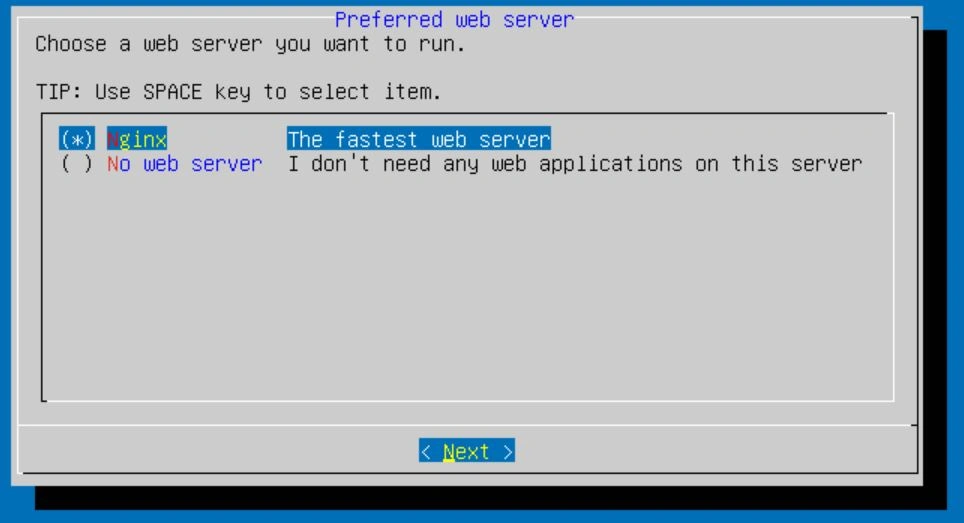
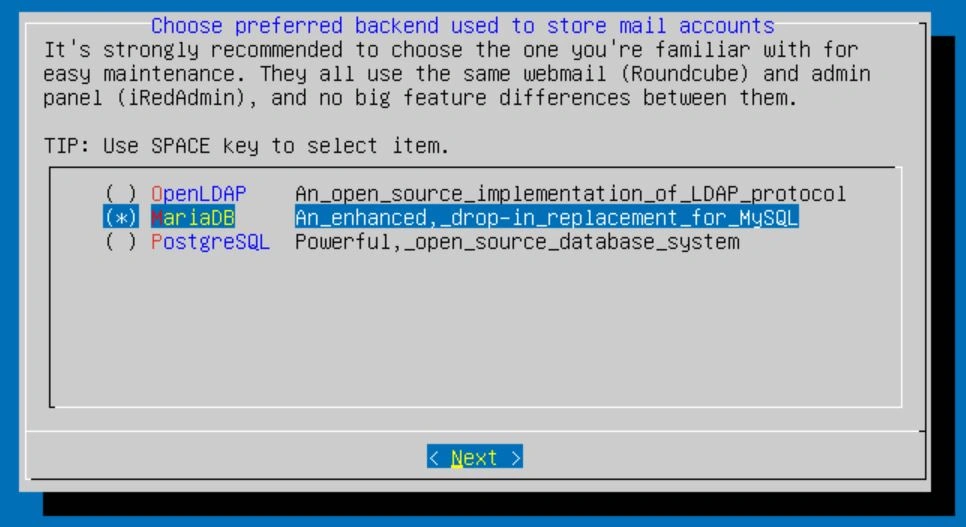
The next option is for the database. I'm going with MariaDB as that's what I'm familiar with, but you can choose whichever you like. You can scroll with arrow keys and select an option with the spacebar. The enter key will confirm your selection.
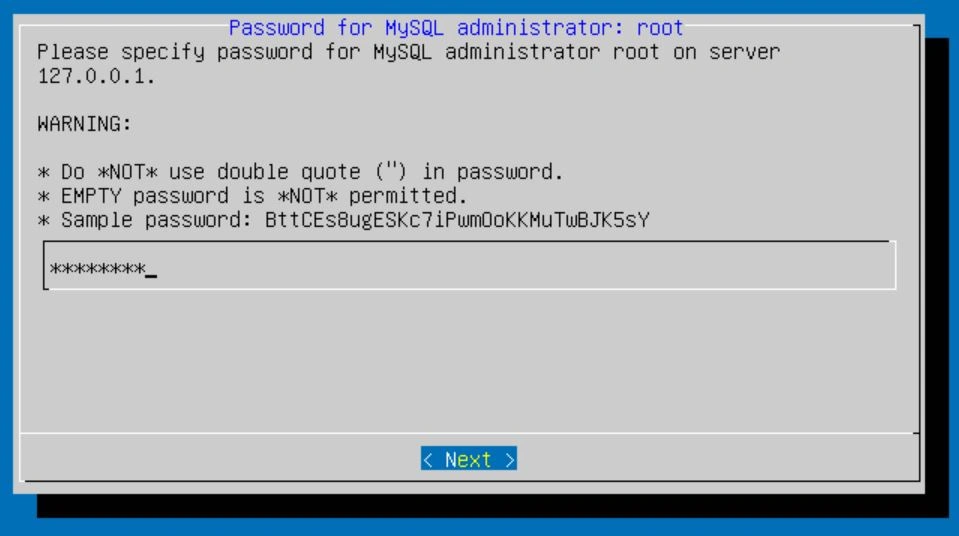
After selecting a database, it will ask you to set a password for the database admin. I would recommend a password over 16 characters for security.
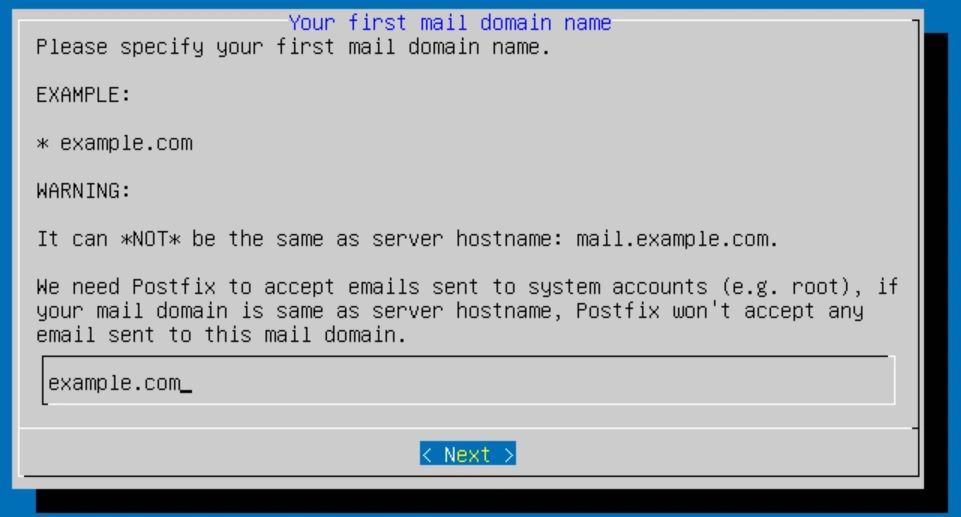
Now it's going to ask you to specify a mail domain name. This should be your FQDN. In my case, I will put example.com.
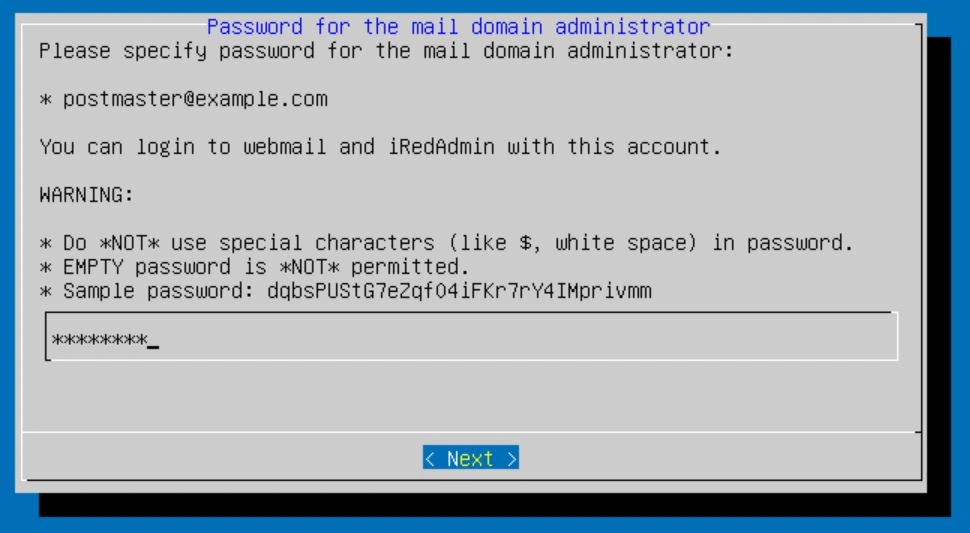
The next thing you should see will be the password selector for the admin account. This is VERY important, so choose something strong and write it down. The email by default should be postmaster@{your FQDN}. For example, mine would be [email protected].
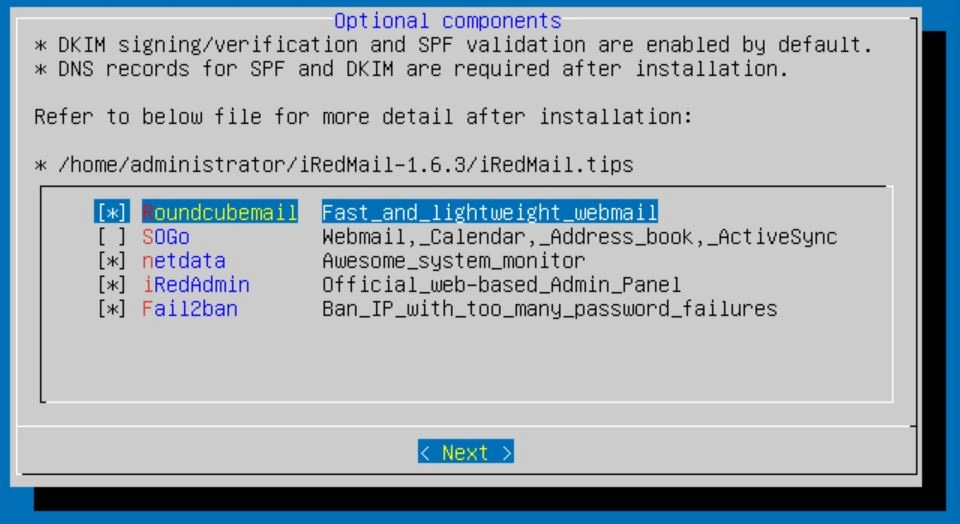
Finally, you should see a screen asking about RoundCubeMail, SOGo, iRedAdmin, and Fail2ban. I would leave the selection as default.
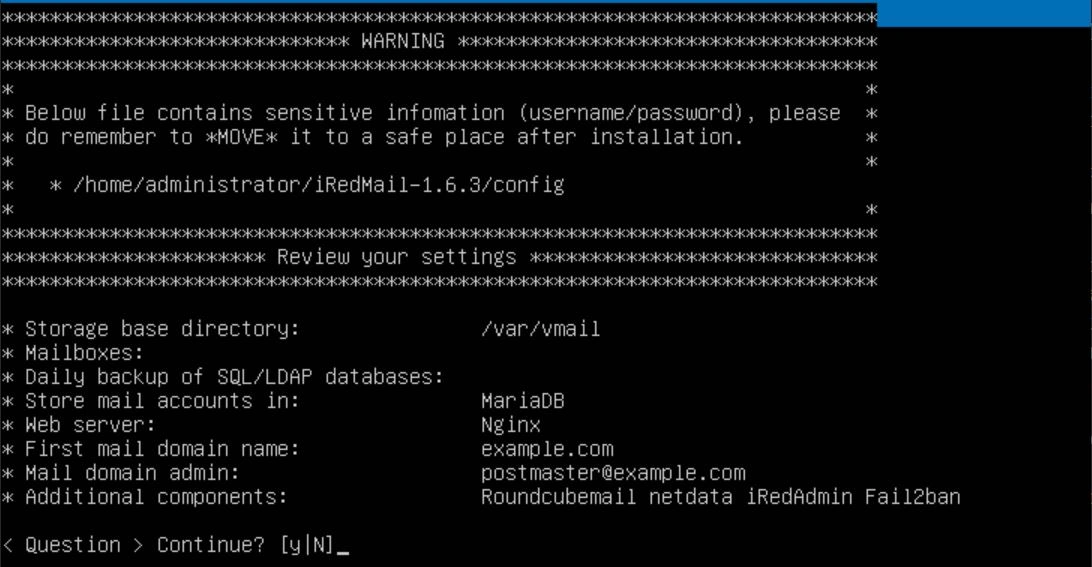
Next, you should be prompted to continue. Keep in mind that there are files that have sensitive information, so put them somewhere secure and limit access to the root user. When you're ready, type "y" and then hit enter.
After about 10 minutes, depending on your internet, it should be done configuring. When it's done, you should see a banner saying "configuration complete" and then a couple of questions. Answer "yes" or "y" to all of them. This will automatically configure the firewall rules for your new server.

Once that's done, you should reboot your server using the command "shutdown -r now".
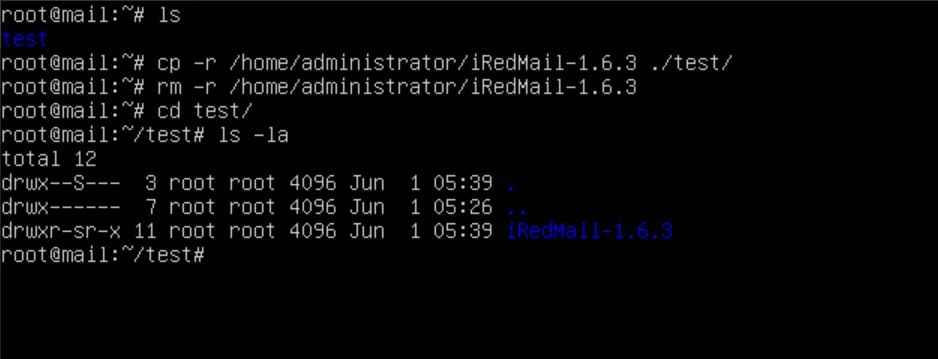
When the server comes back up, we should move the sensitive files to a safe location. You can create one using the following commands: "sudo su" (this will make you root), "cd" (this will move you to the root directory), "mkdir /{directory name}" (this creates a new directory), and then the command "chmod 700 /{directory name}" (this will make it so only the root user can access the directory). To view the permissions of a file, you can use the "ls -la" command.
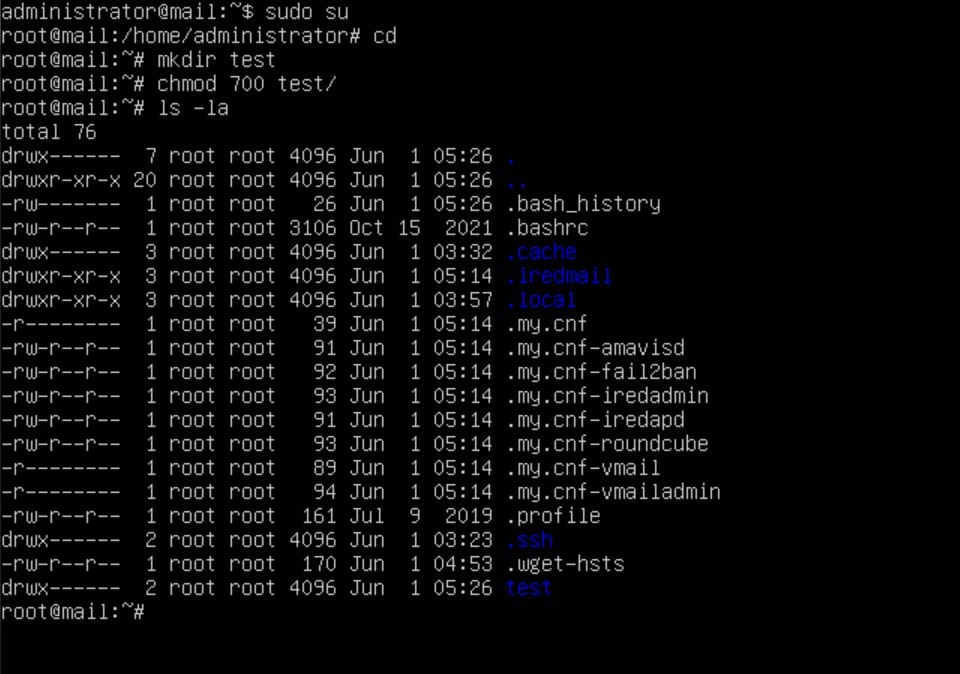
With a secure directory set up, you can now move any files that have sensitive information in them into that directory with the following commands: "cp -r /home/{user}/{ired_directory} ./{your directory}/" (this will move the ired directory into the folder we just made), "rm -r /home/{user}/{ired_directory}" (this removes the ired directory that was left after the copy).
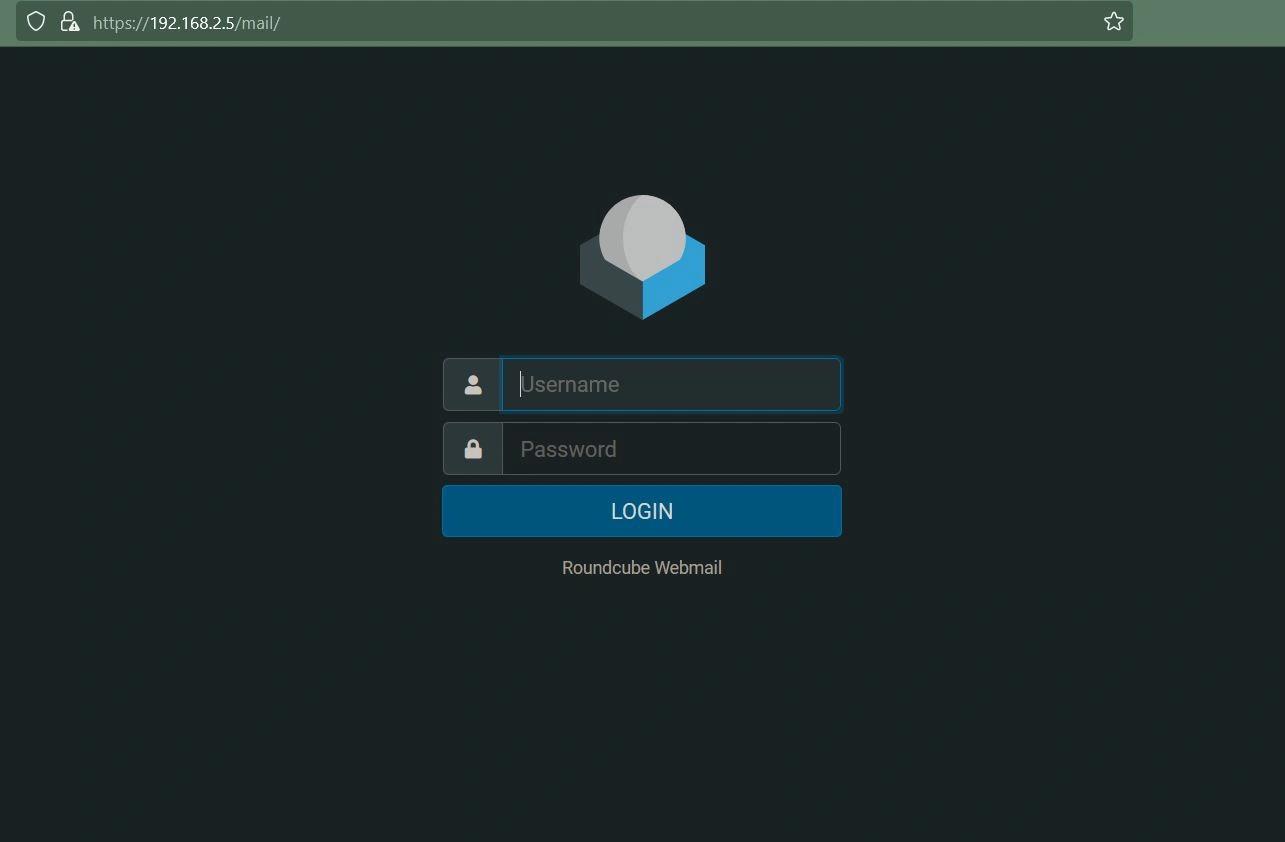
Now that your mail server is up, navigate to the web portal by typing the IP of the server into a browser. In my case, the IP is 192.168.2.5. From here, you will see the RoundCube sign-in page.
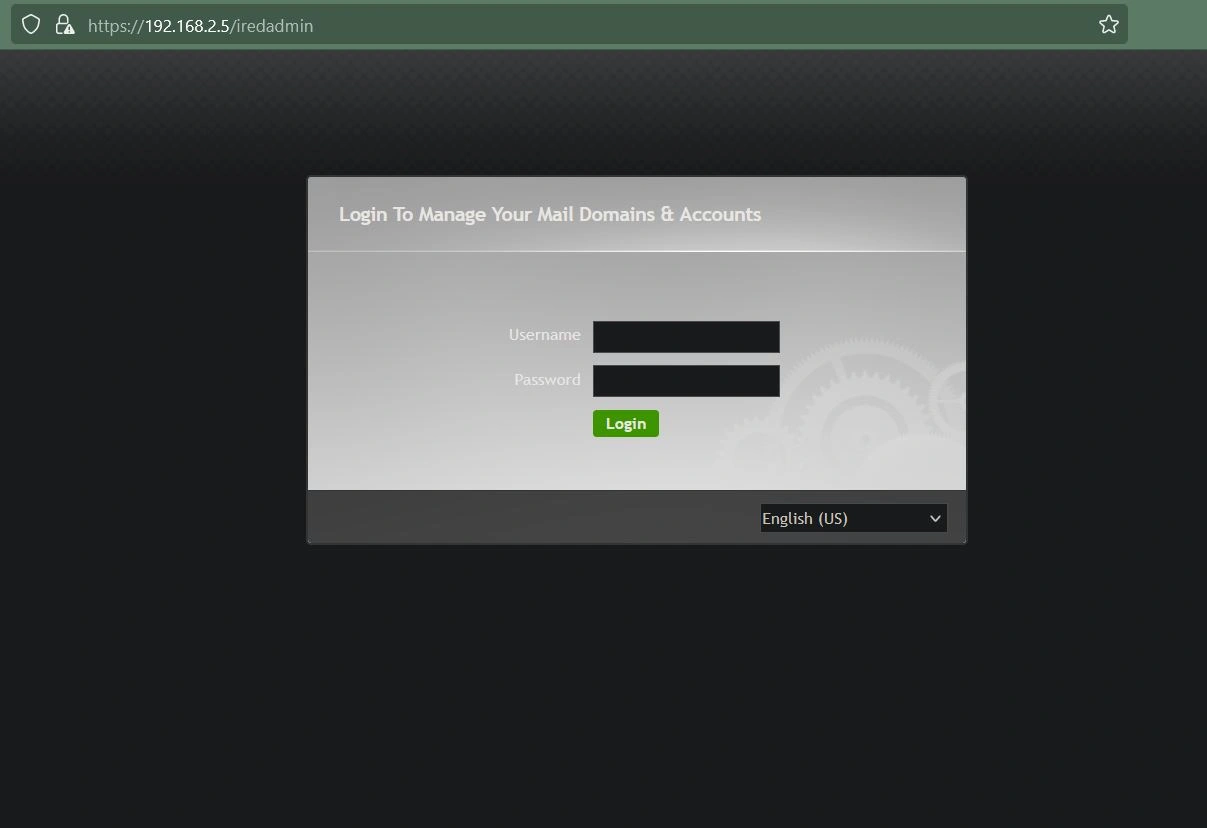
In the URL, replace /mail/ with /iredadmin/. This is how you access the admin panel of your mail server. You can now sign in using the email postmaster@{your FQDN} and the password you created earlier.
Now you have successfully set up an open-source mail server using iRedMail!
Remember to configure your domain's DNS records and DKIM records so that your emails are not rejected by filters. Additionally, configure your firewall on your router to accept and forward packets on port 25.
Nginx Website & Reverse Proxy
What You Need: A Server or a Hypervisor
Note: This requires an FQDN unless you are only making the website available internally and 2 servers or a hypervisor capable of hosting 2 VMs.
Project status: (DONE)
TLDR;
I set up 2 VMs on my hypervisor, both running Ubuntu Server. From there, I installed Nginx on both. I then configured the reverse proxy to forward traffic depending on the header so I could access both my mail server, which we set up previously with iRedMail, and my website.
Tutorial: (DONE)
To start, I will assume you know how to set up 2 Ubuntu VMs. I will be using my Xen Orchestra Project to spin up 2 VMs for this. If you want to know how to do that, refer to my Xen Orchestra Project. Accept all of the defaults, and once you have a shell, it's best practice to update using the command "sudo apt update -y && sudo apt upgrade -y".
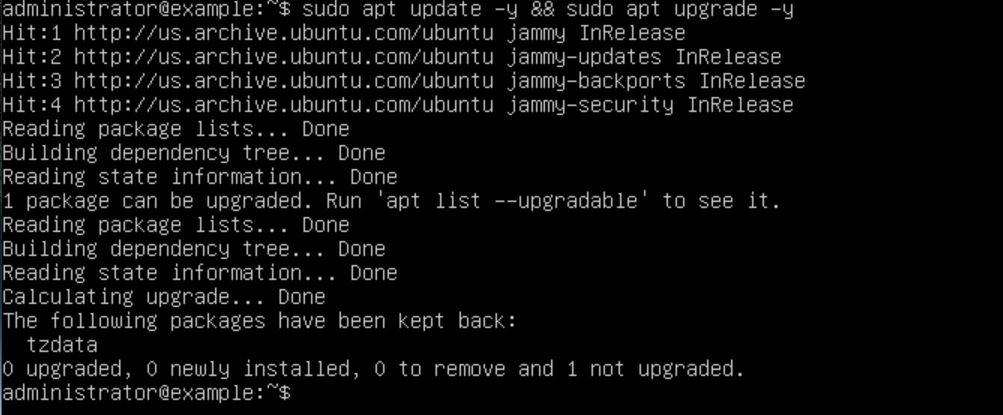
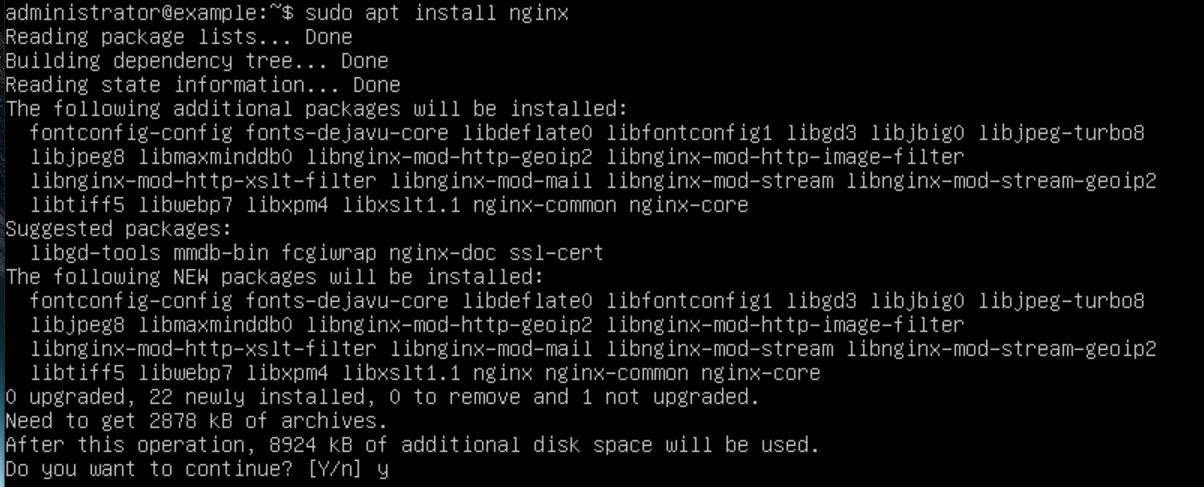
Once your servers are done updating, you will need to install Nginx on each of them using the command "sudo apt install nginx". After that is done, confirm that the directory /etc/nginx/ exists on each server.

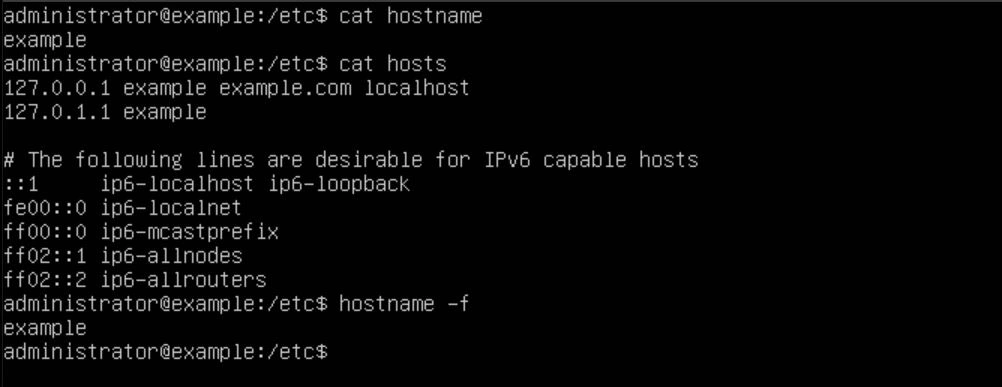
We should configure our /etc/hostname file to contain our proper subdomain of our FQDN. In this tutorial, my FQDN will be example.com, so my hostname will be example this is not required but it is good practice. We also want to edit our /etc/hosts file, adding the line "127.0.0.1 example example.com localhost". Finally, to verify the hostname, use the command "hostname -f". If it didn't change, restart the server. If that still doesn't work, make sure the changes to the /etc/hostname file saved.
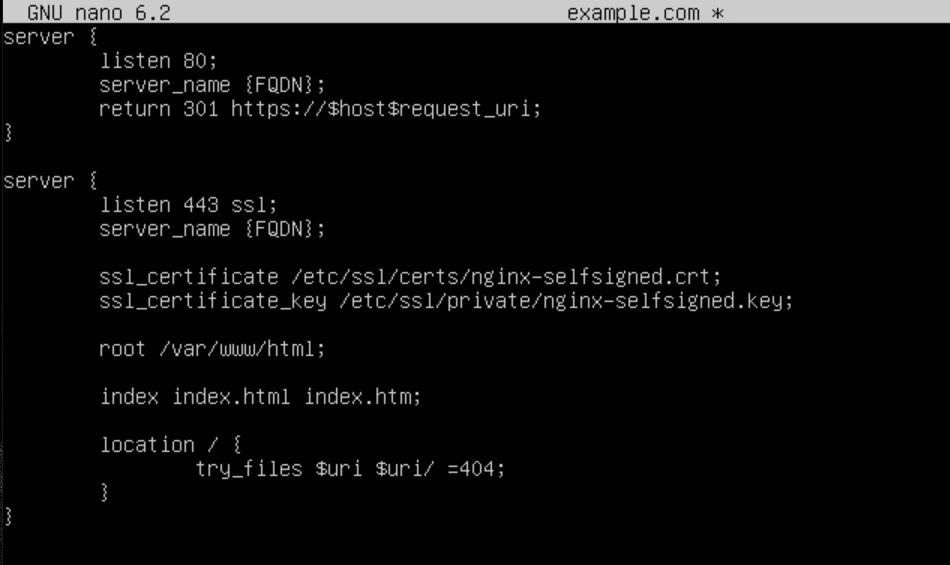
Now that we have Nginx installed, we want to create a new file in the /etc/nginx/sites-available/ directory with our FQDN as the name. In this example, I will be using the FQDN example.com.

In this file, we want to specify our Nginx configuration. Make sure to replace {FQDN} with your own FQDN.
Here is an example of my configuration with my FQDN example.com:
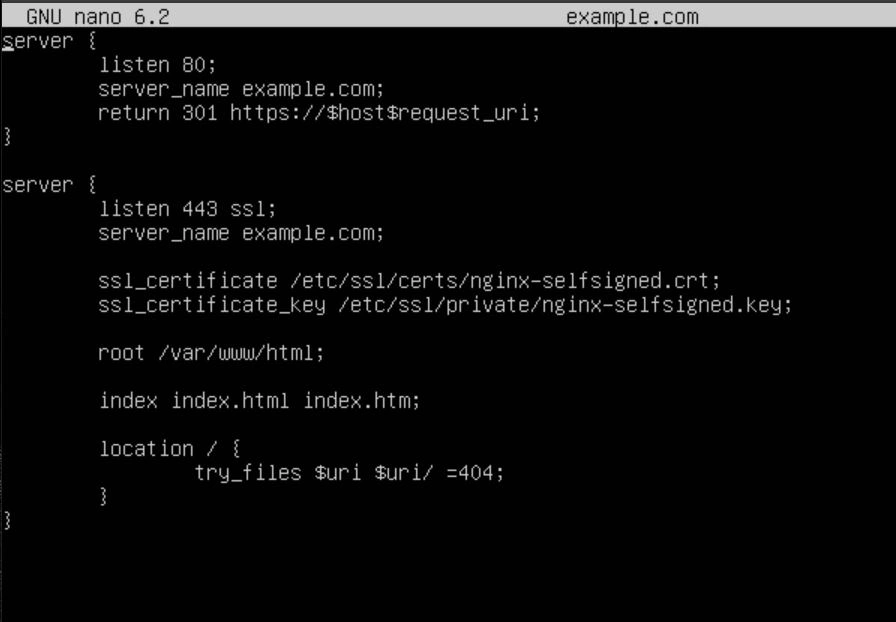
The top server block tells Nginx to listen on port 80 and return a 301 redirect to anyone who visits it.

The next server block tells Nginx to listen on port 443. The next 2 lines specify our SSL certificates, which we will be configuring next. Finally, the rest of the configuration block specifies where the root of the webserver will live and what files it will try to load first. Once your configuration is saved, don't forget to remove the default file with the command "sudo rm /etc/nginx/sites-available/default".
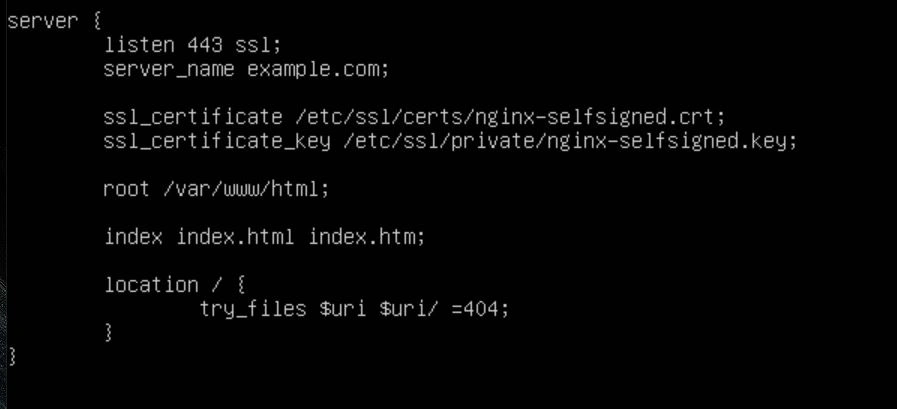
Once your configuration is in place, you can save and exit the file. We now want to generate the SSL Certificates so Nginx can function properly. To do this, use the following command "sudo openssl req -x509 -nodes -days 365 -newkey rsa:2048 -keyout /etc/ssl/private/nginx-selfsigned.key -out /etc/ssl/certs/nginx-selfsigned.crt". Thanks to https://www.digitalocean.com/community/tutorials/how-to-create-a-self-signed-ssl-certificate-for-nginx-in-ubuntu-20-04-1 for a great tutorial on generating self-signed SSL certificates.

Now that our SSL certs are in place, we need to create a symlink to our config file in the sites-enabled directory using the following command "sudo ln -s /etc/nginx/sites-available/example.com /etc/nginx/sites-enabled/".

With our configuration all set up, all we have to do is test it with the command "sudo nginx -t".

Now that our Nginx config is ready, let's restart Nginx with the command "sudo systemctl restart nginx". Then we can check that it's running and working by using the command "sudo systemctl status nginx". We should see "active" in green text.
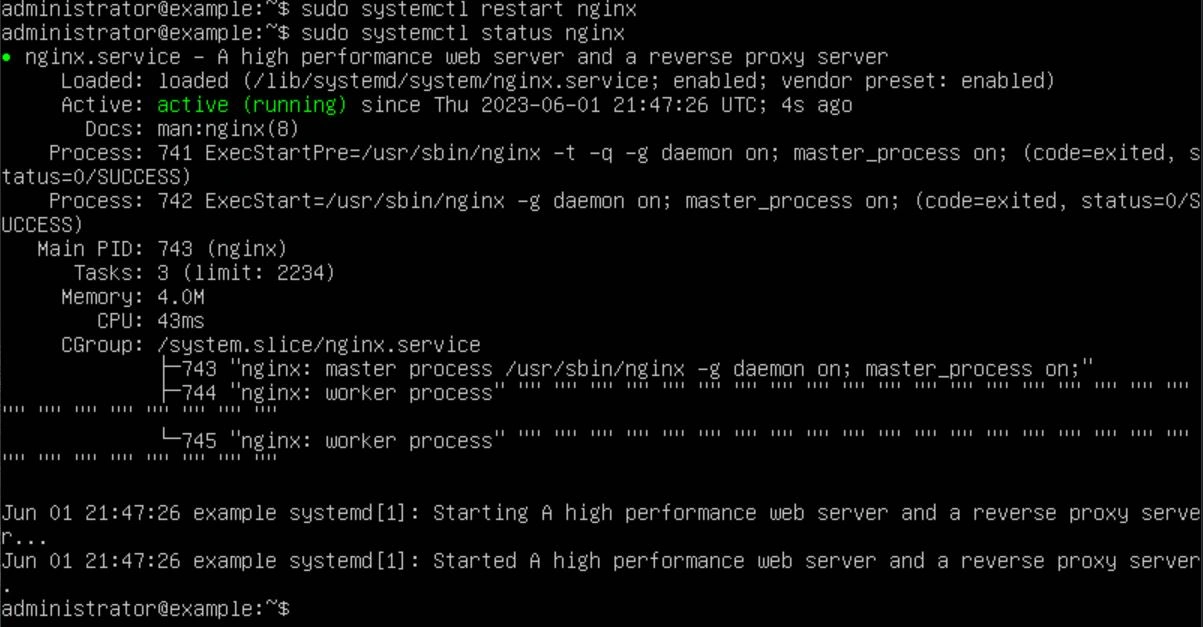
We're almost done with the website; there are just a few more things we need to do. First, navigate to the root of your webserver. In this case, it would be /var/www/html/ and use the command "sudo mv index.nginx-debian.html ./index.html" (this renames the file to index.html). Finally, we want to test the redirect and connection functionality using the following commands: "curl -k http://127.0.0.1" (this will return the 301 HTTP packet). If we do not get a 301, there is an error in your configuration file. The next command tests SSL: "curl -k https://127.0.0.1" (this will return the HTML of our website).
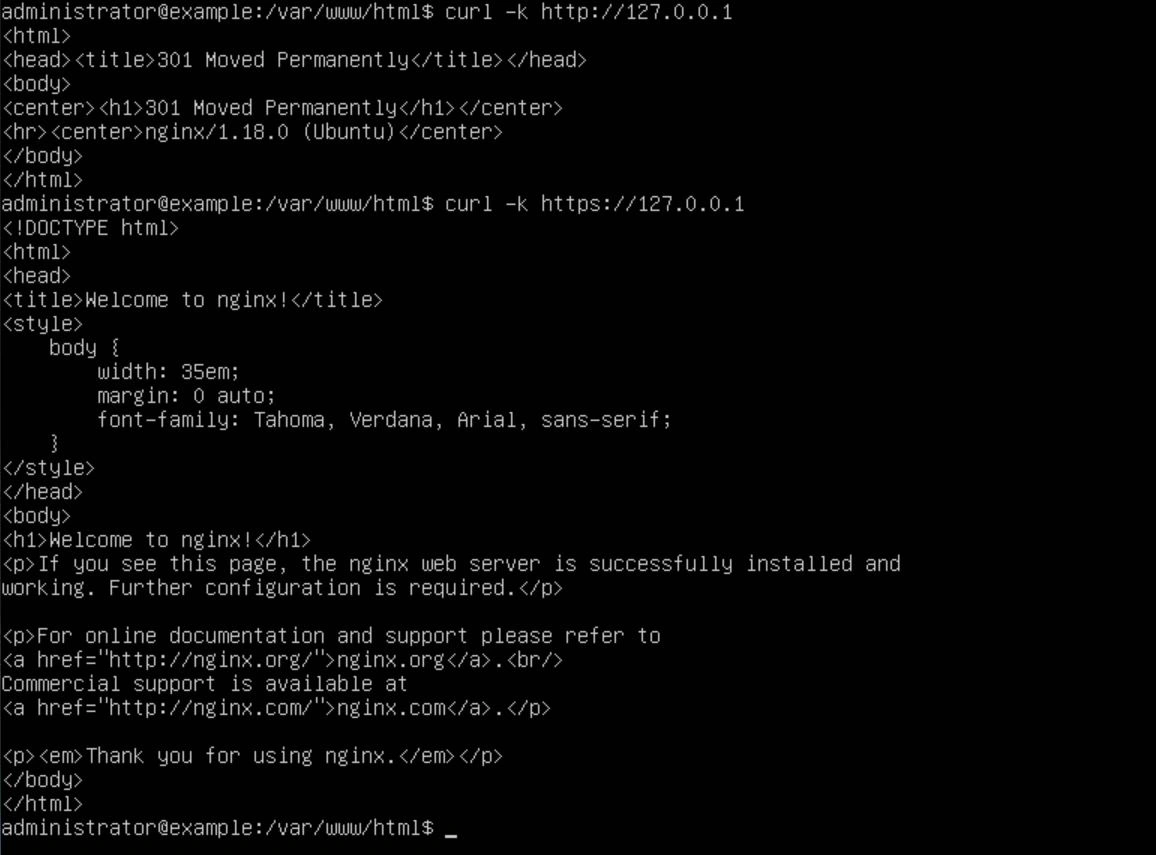
Now that our website is working, we can put the HTML files in the root directory of the webserver located at /var/www/html/ to serve up whatever content we want. Also, make sure you take note of the IP address that your website has. In this instance, my IP is 192.168.2.10.
Now that the web server is up and running, let's move on to configuring the reverse proxy. On the reverse proxy, we want to perform the same steps as before: create a new file called {your FQDN}.conf in the /etc/nginx/sites-available/ directory and create a symlink with this command "ln -s /etc/nginx/sites-available/example.conf /etc/nginx/sites-enabled/", edit the /etc/hosts file and the /etc/hostname file; however, change the hostname to something different. In my case, I will be using "revproxy".

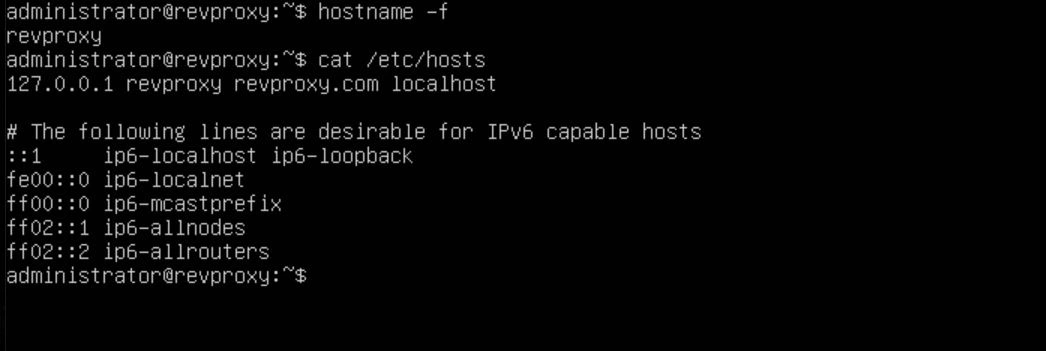
Now we want to edit our configuration file to forward all traffic to our backend webserver, which is still on IP 192.168.2.10. Below you will find our configuration for port 80.

Next, we want to configure the SSL side of things, so we will set up a server block below our port 80 server, listening on port 443.

The next part of the server block will set the proxy headers and where to redirect to.

Finally, we will be setting some security headers. There are many ways to defend a server, and this is just a small part of it. I will be compiling a list of best practices and how-to's when I get the time, but for your test environment, this should work for now.

Now that the reverse proxy is configured, it's time to test. Edit your /etc/hosts file to include the line "192.168.2.10 example.com" and then use curl to see if you're being redirected to your backend website.
One of the last steps is to configure your firewall. My reverse proxy is set to 192.168.2.11, so I went to my router to configure port forwarding. I forwarded port 80 and 443 to 192.168.2.11.
Congratulations! Your website should be available from your public IP now. But don't celebrate yet; you still need to configure your DNS records and get real certificates that aren't self-signed. For more information on how to do that, refer to my DNS and SSL project.
DNS and SSL Certificates
What You Need: A Server that's hosting a website or mail server and a Fully Qualified Domain Name (FQDN)
Note: This requires an FQDN unless you are only making the website available internally, in which case, I would recommend my certificate authority tutorial to you.
Project status: (DONE)
TLDR;
With a Mail server and Website configured and ready to go, I set up SSL certs using Let's Encrypt and my DNS records, including my A records, MX records, DMARC records, and DKIM records.
Tutorial: (In Progress)
Lets start with SSL, assuming you followed the previous tutorials you should
Hosting your own Certificate Authority
What You Need: A Server or a Hypervisor
Note: This requires a Server or Hypervisor capable of hosting a Certificate Authority
Project status: (In Progress)
TLDR;
I set up an Ubuntu server to act as a Certificate Authority for my internal network.
Tutorial: (In Progress)
IPsec and Public Key Infrastructure
What You Need: A Server or a Hypervisor
Note:
Project status: (In Progress)
TLDR;
Pending
